Azure Devops: CICD Setup
In this tutorial, we will explore how to create CICD pipeline on the Azure Devops environment.
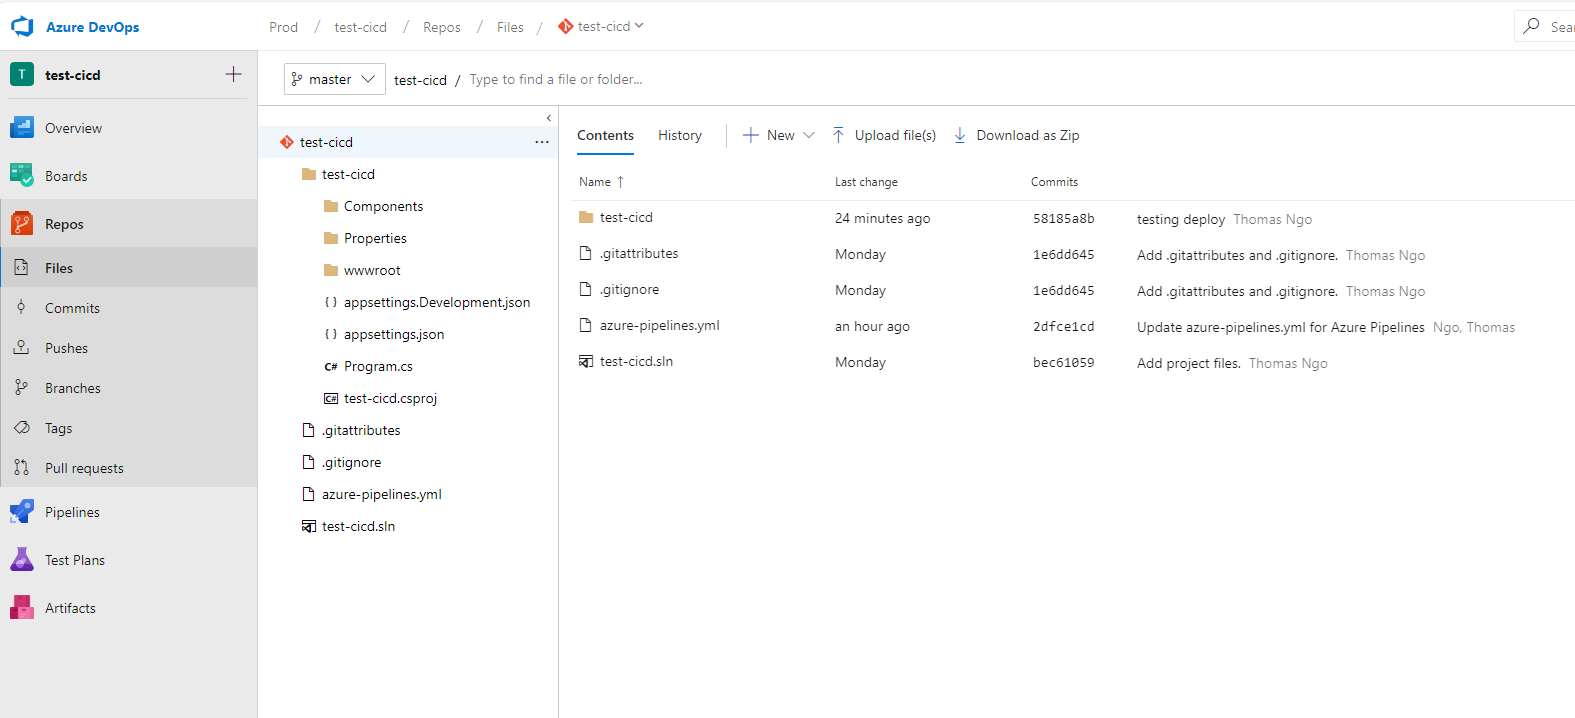
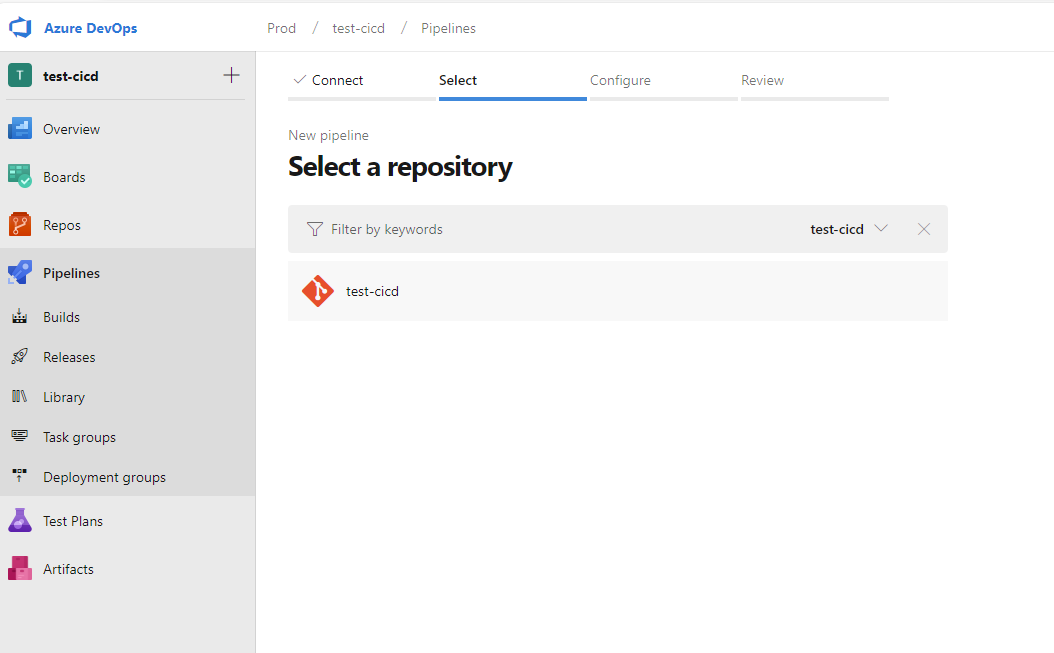
Create A Repo on Azure DevOps
Before diving into how to set up the CICD on Azure Devops, we need to create a repo and store our project inside the DevOps
Create Agent
Next, we need to create an agent that will help us to build and publish the artifacts. The agent that we are about to create is called self-hosted agents
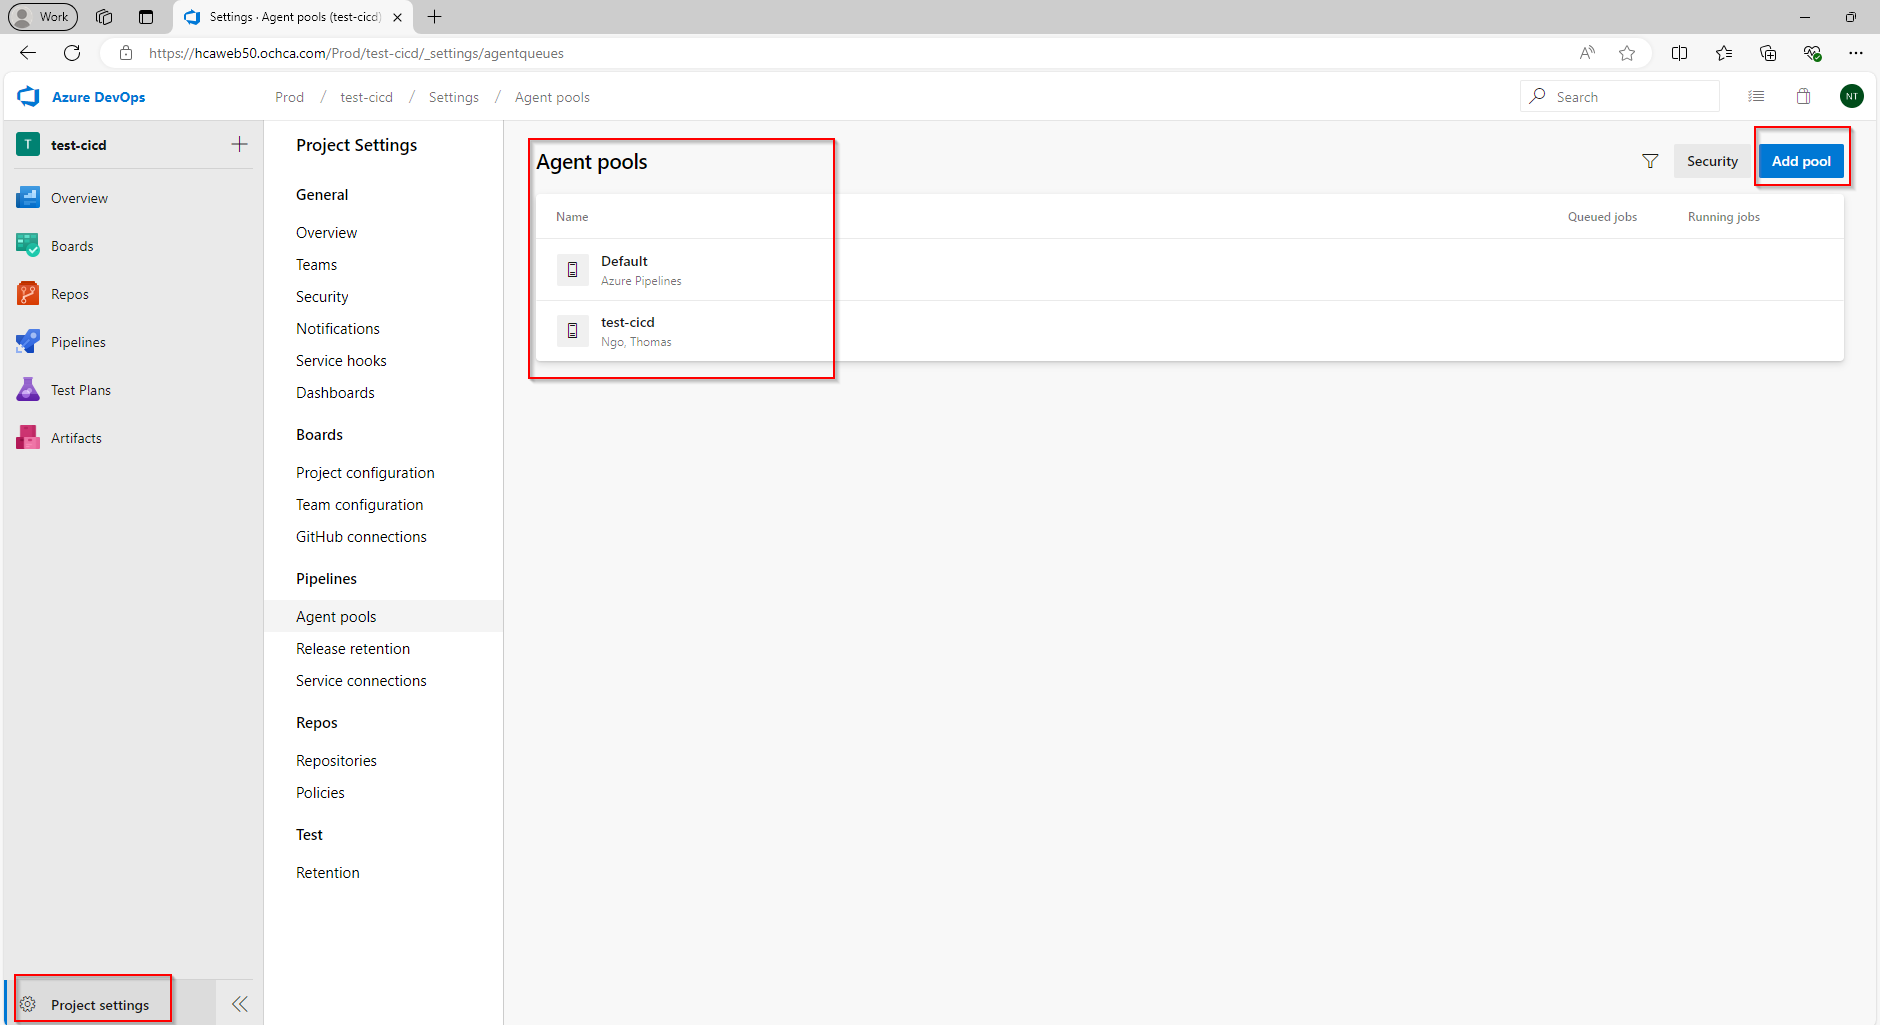
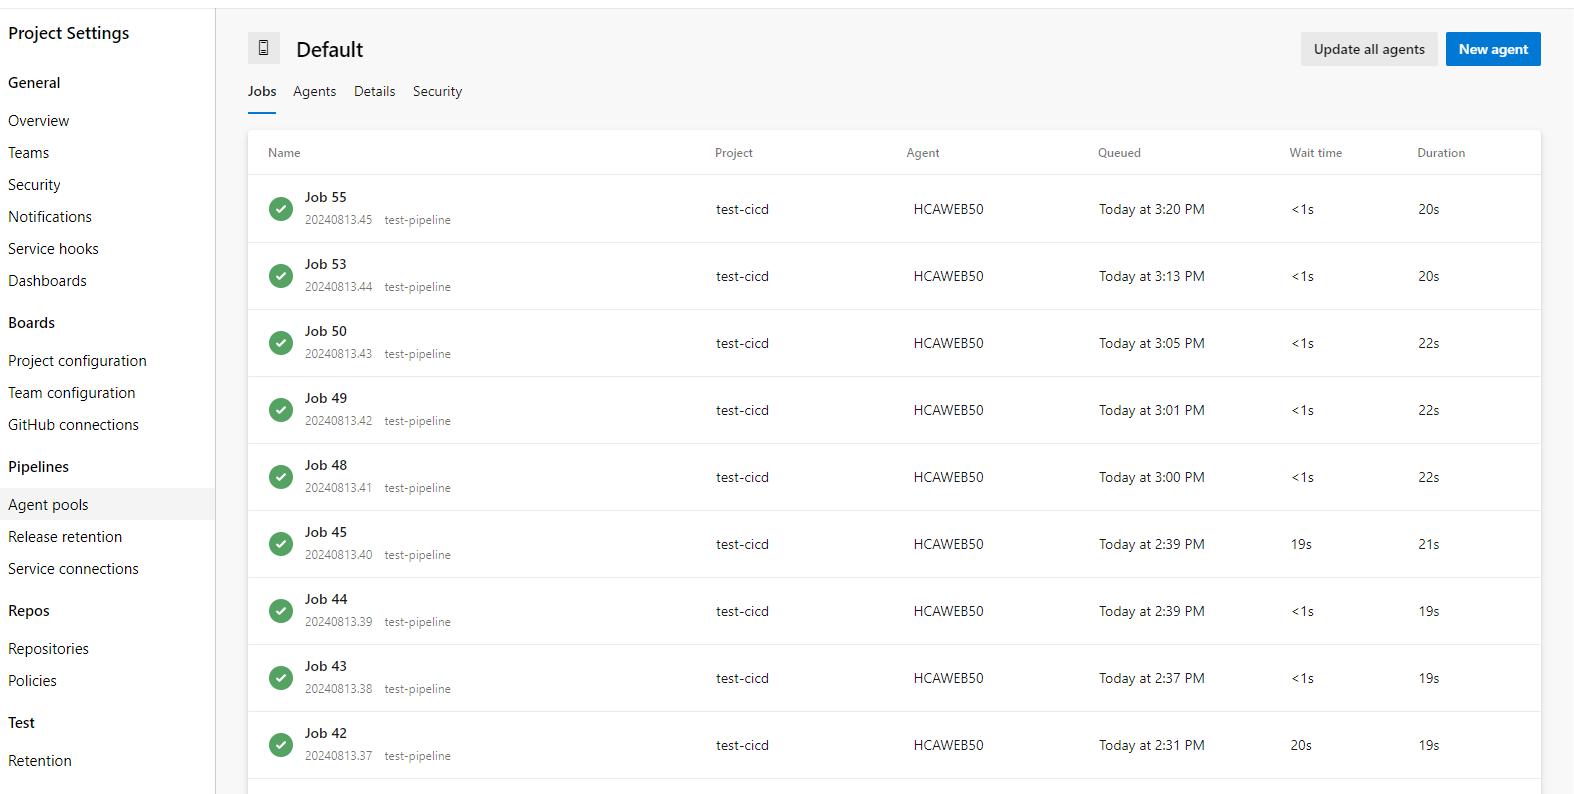
Click on New agent, we will see a window popup that guides us to create a new agent inside our windows server.
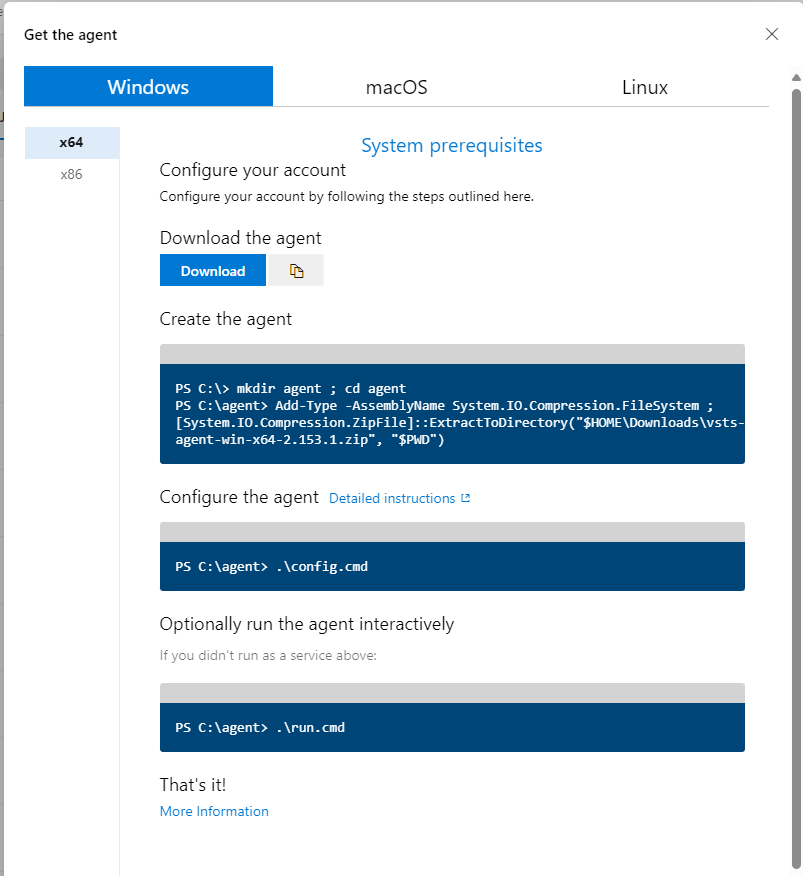
We can also download the agent from this Download the agent
Create the Agent command
PS C:\> mkdir agent ; cd agent
PS C:\agent> Add-Type -AssemblyName System.IO.Compression.FileSystem ; [System.IO.Compression.ZipFile]::ExtractToDirectory("$HOME\Downloads\vsts-agent-win-x64-2.153.1.zip", "$PWD")
Configure the agent command
PS C:\agent> .\config.cmd
Run agent
PS C:\agent> .\run.cmd
There is a very useful tool that I used to remote desktop to the windows server. It’s called RDBMan. It’s one of the SysinternalsSuite that Microsoft developed and collected.
Link to download SysinternalsSuite
With that said, we can now use the tools and commands that we learn to create new agent inside the windows server.
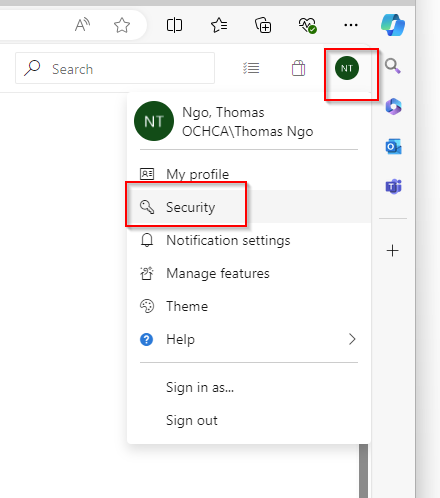
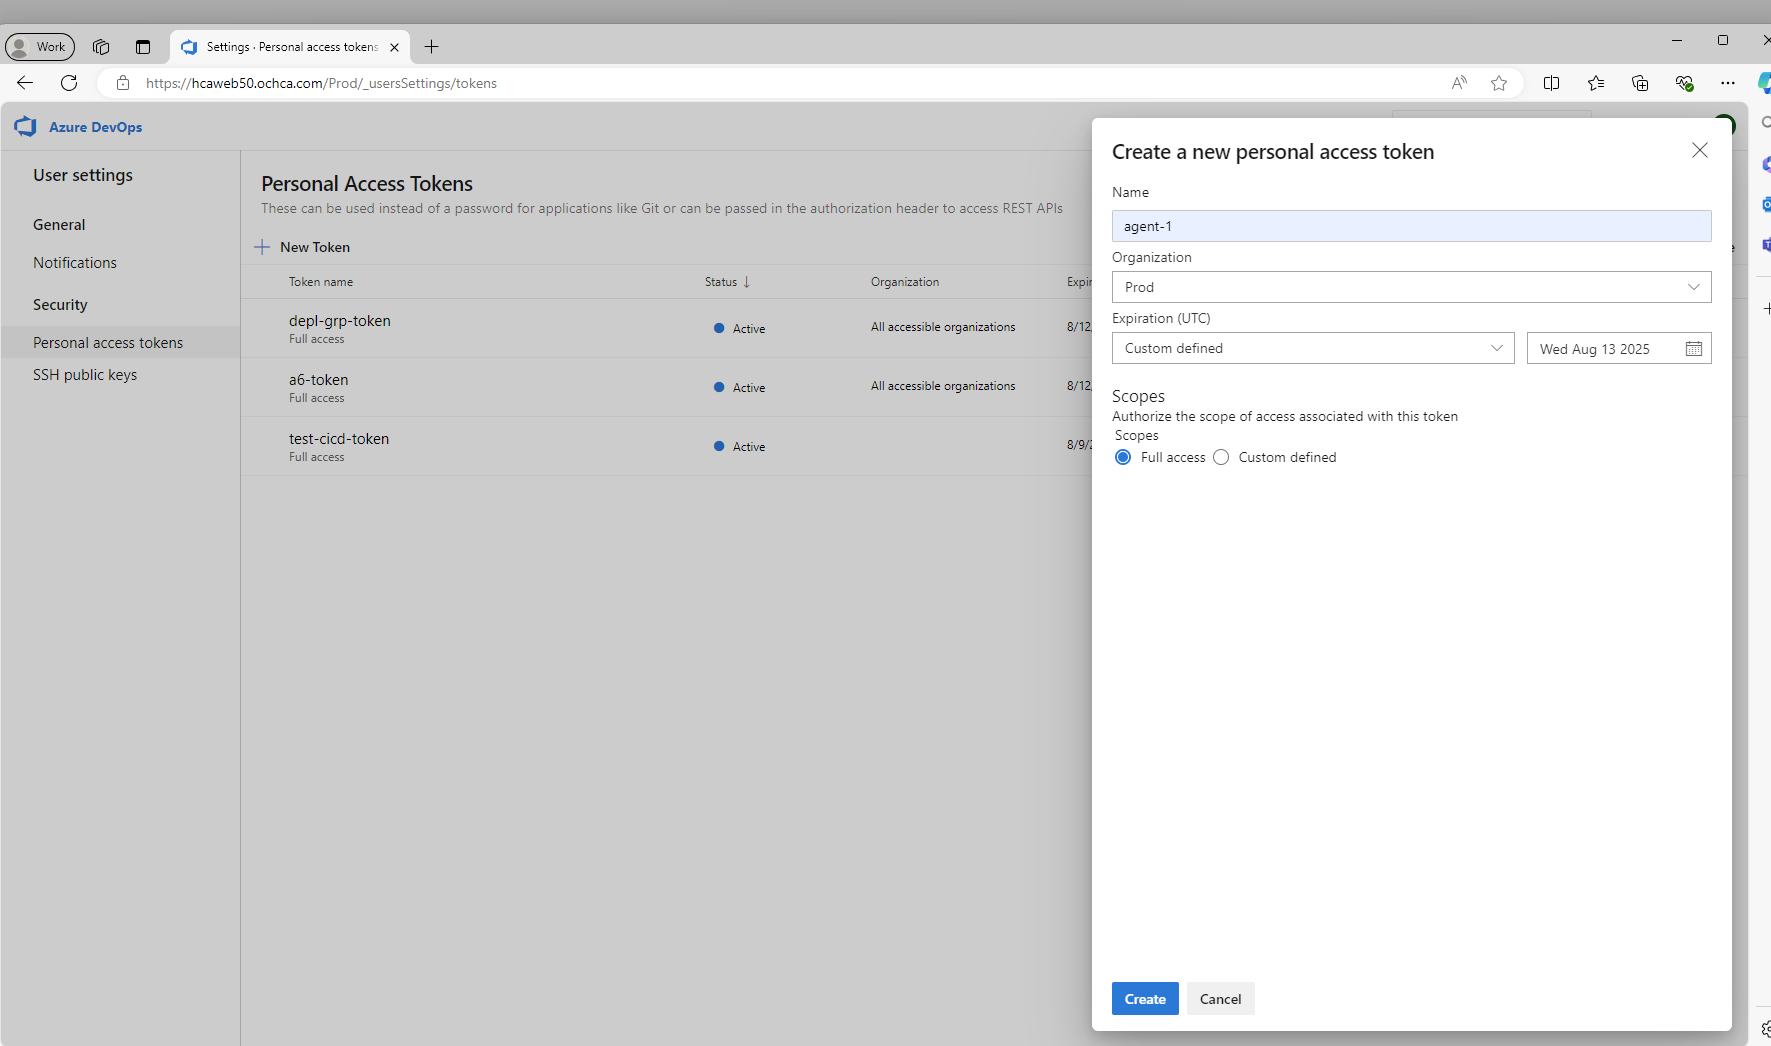
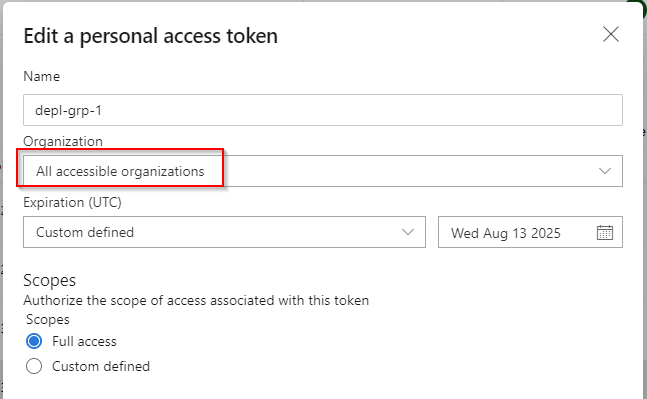
Generate PAT
During the create new agent, we will be asked to provide PAT (Personal Access Token), we can generate the token as following.
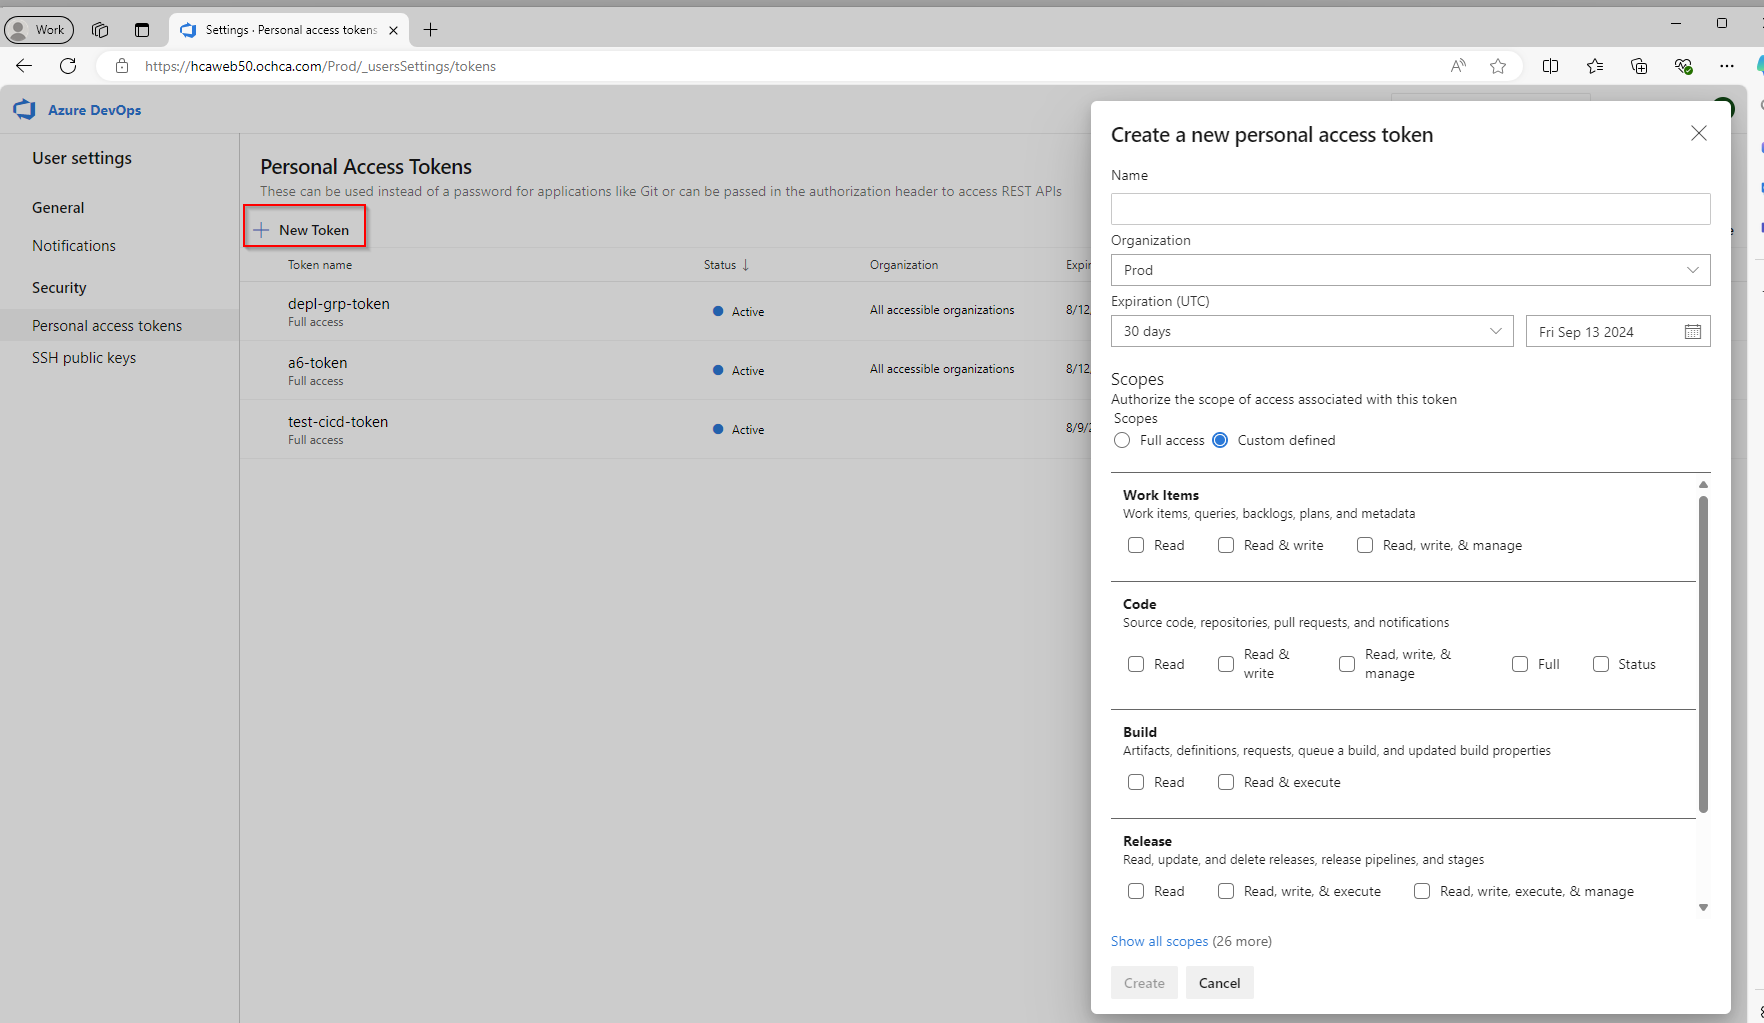
Note: Choose All Accessible Organizations for the Organization field
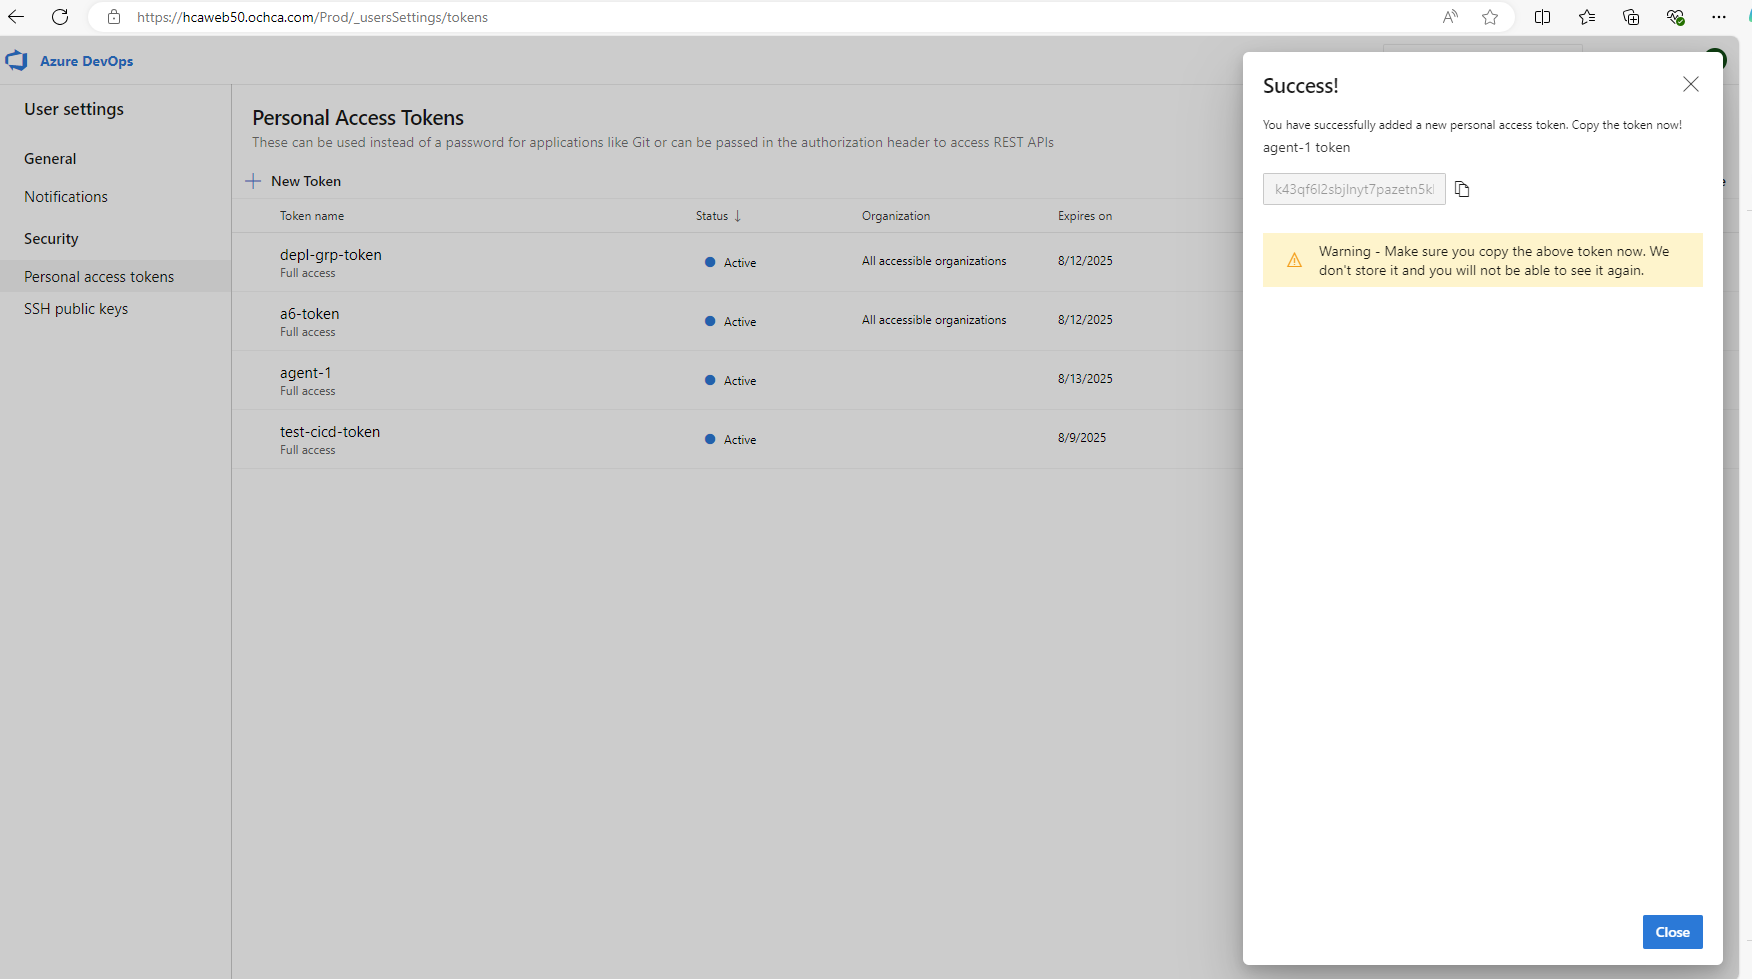
Make sure to save the token on a text file or somewhere so that we can use it later.
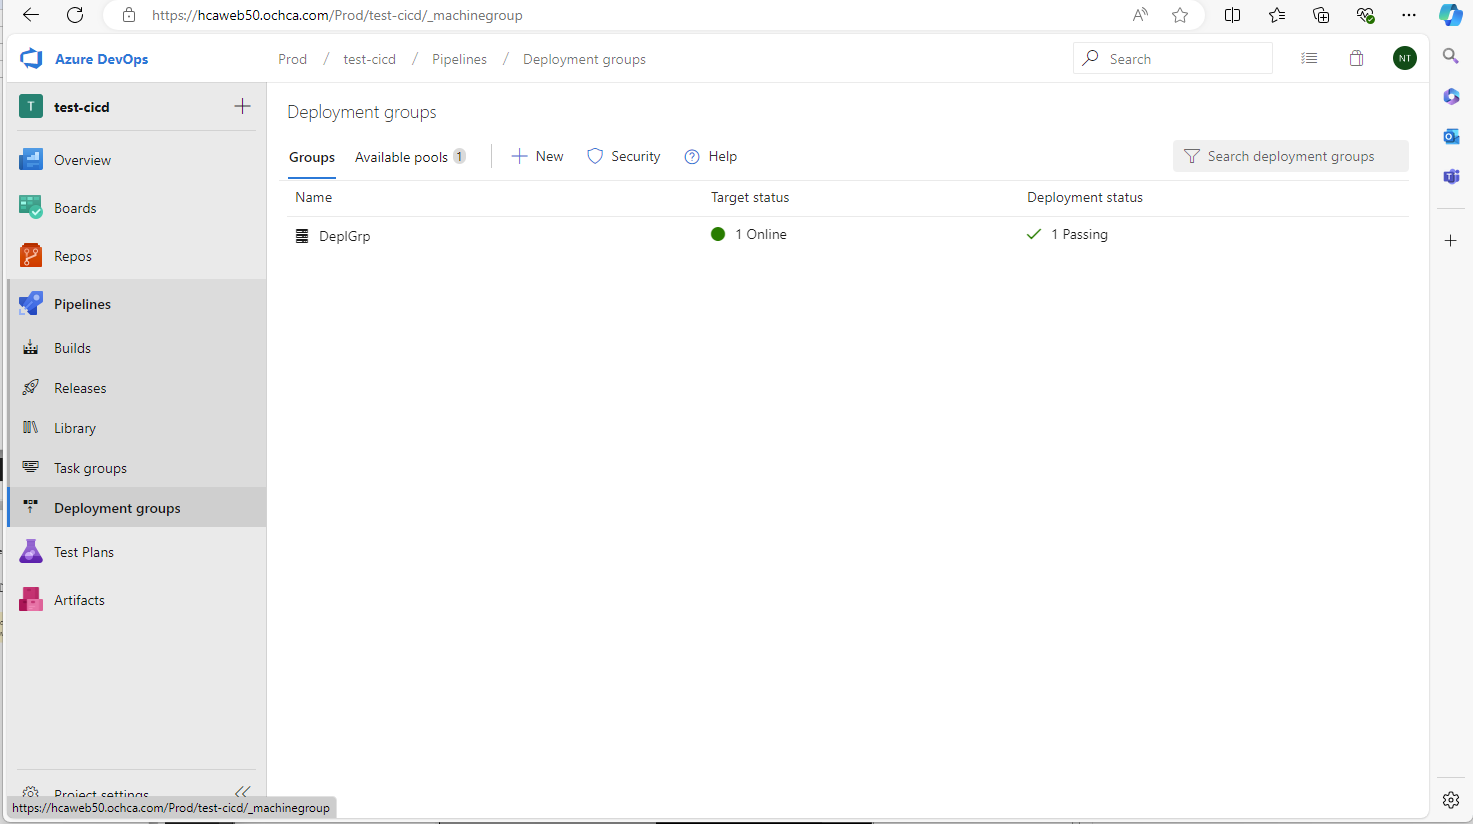
Create Deployment Group
When we create release pipeline, Azure Devops will require us to select a deployment group. So we need to create one if there is no deployment group available.
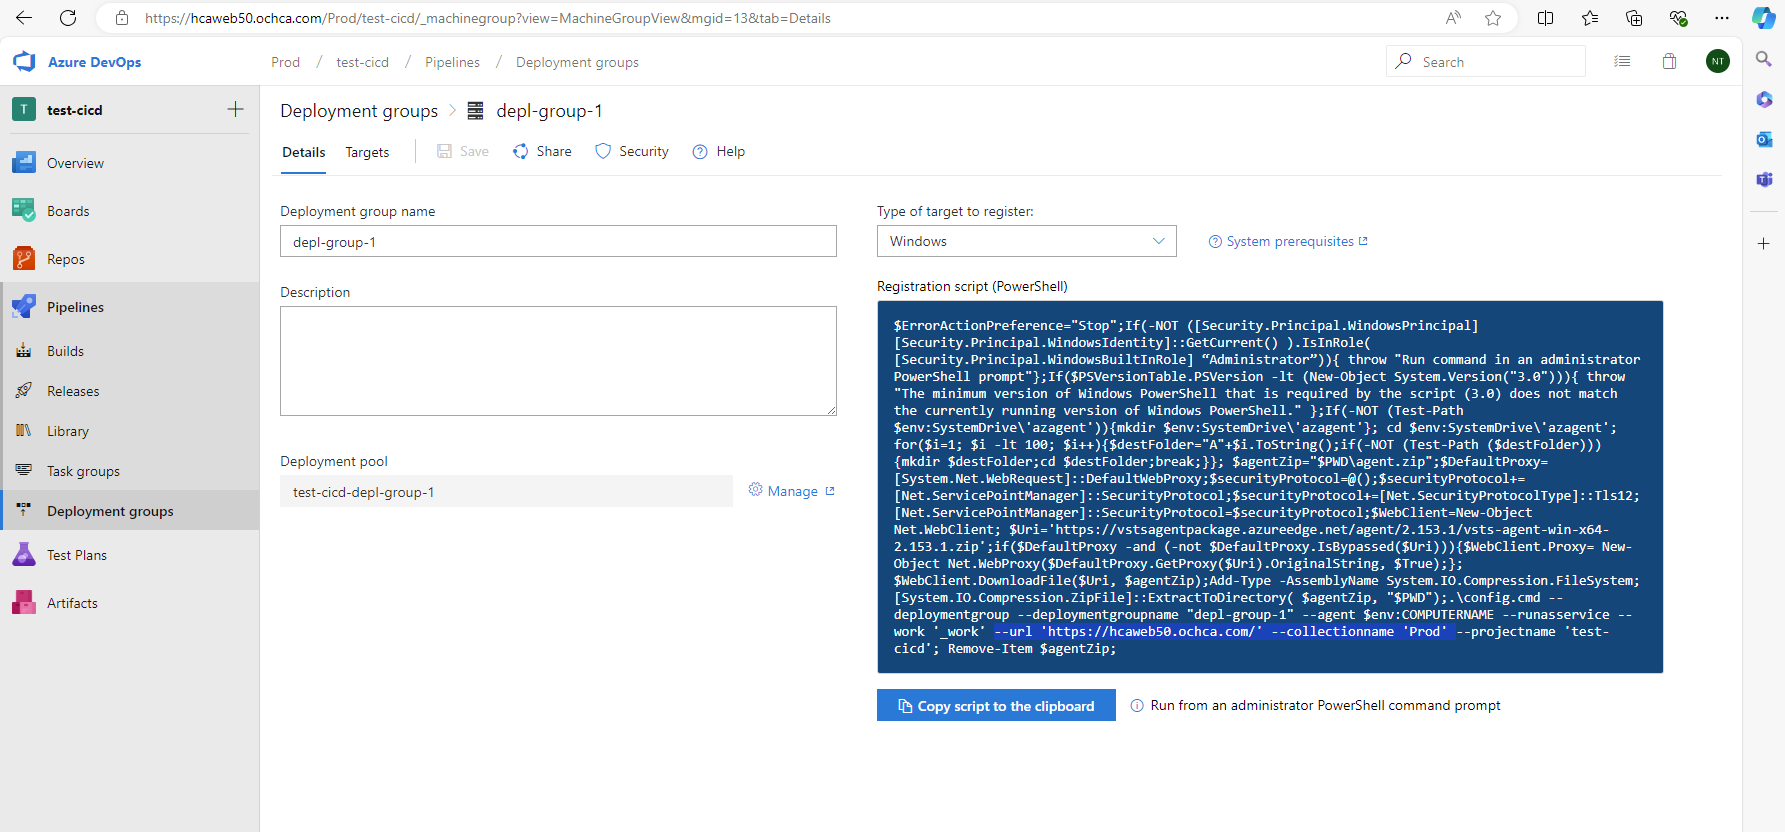
Sample of the deployment group command.
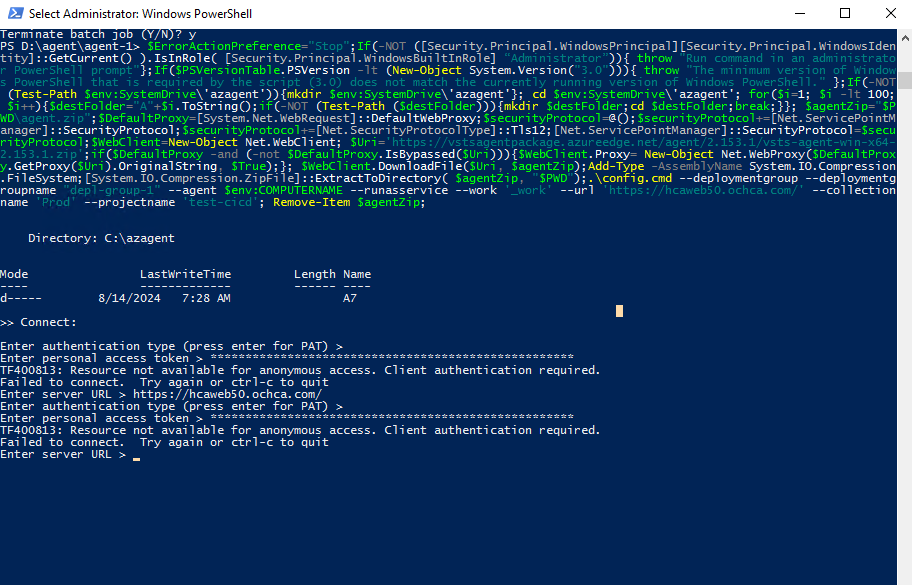
$ErrorActionPreference="Stop";If(-NOT ([Security.Principal.WindowsPrincipal][Security.Principal.WindowsIdentity]::GetCurrent() ).IsInRole( [Security.Principal.WindowsBuiltInRole] “Administrator”)){ throw "Run command in an administrator PowerShell prompt"};If($PSVersionTable.PSVersion -lt (New-Object System.Version("3.0"))){ throw "The minimum version of Windows PowerShell that is required by the script (3.0) does not match the currently running version of Windows PowerShell." };If(-NOT (Test-Path $env:SystemDrive\'azagent')){mkdir $env:SystemDrive\'azagent'}; cd $env:SystemDrive\'azagent'; for($i=1; $i -lt 100; $i++){$destFolder="A"+$i.ToString();if(-NOT (Test-Path ($destFolder))){mkdir $destFolder;cd $destFolder;break;}}; $agentZip="$PWD\agent.zip";$DefaultProxy=[System.Net.WebRequest]::DefaultWebProxy;$securityProtocol=@();$securityProtocol+=[Net.ServicePointManager]::SecurityProtocol;$securityProtocol+=[Net.SecurityProtocolType]::Tls12;[Net.ServicePointManager]::SecurityProtocol=$securityProtocol;$WebClient=New-Object Net.WebClient; $Uri='https://vstsagentpackage.azureedge.net/agent/2.153.1/vsts-agent-win-x64-2.153.1.zip';if($DefaultProxy -and (-not $DefaultProxy.IsBypassed($Uri))){$WebClient.Proxy= New-Object Net.WebProxy($DefaultProxy.GetProxy($Uri).OriginalString, $True);}; $WebClient.DownloadFile($Uri, $agentZip);Add-Type -AssemblyName System.IO.Compression.FileSystem;[System.IO.Compression.ZipFile]::ExtractToDirectory( $agentZip, "$PWD");.\config.cmd --deploymentgroup --deploymentgroupname "depl-group-1" --agent $env:COMPUTERNAME --runasservice --work '_work' --url 'https://hcaweb50.ochca.com/' --collectionname 'Prod' --projectname 'test-cicd'; Remove-Item $agentZip;
Use the PAT that we generate from the above step.
If we encounter the issue Resource not available for anonymous access. Client authentication required. , we need to check the deployment group token, make sure this token is used to access all organization.
Issue:
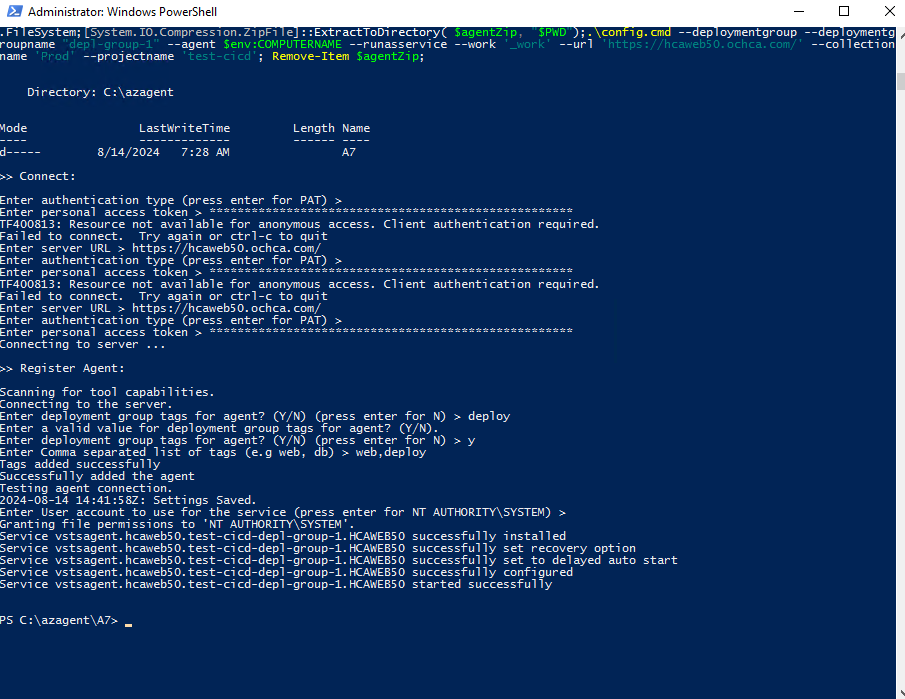
Resolve:
Success:
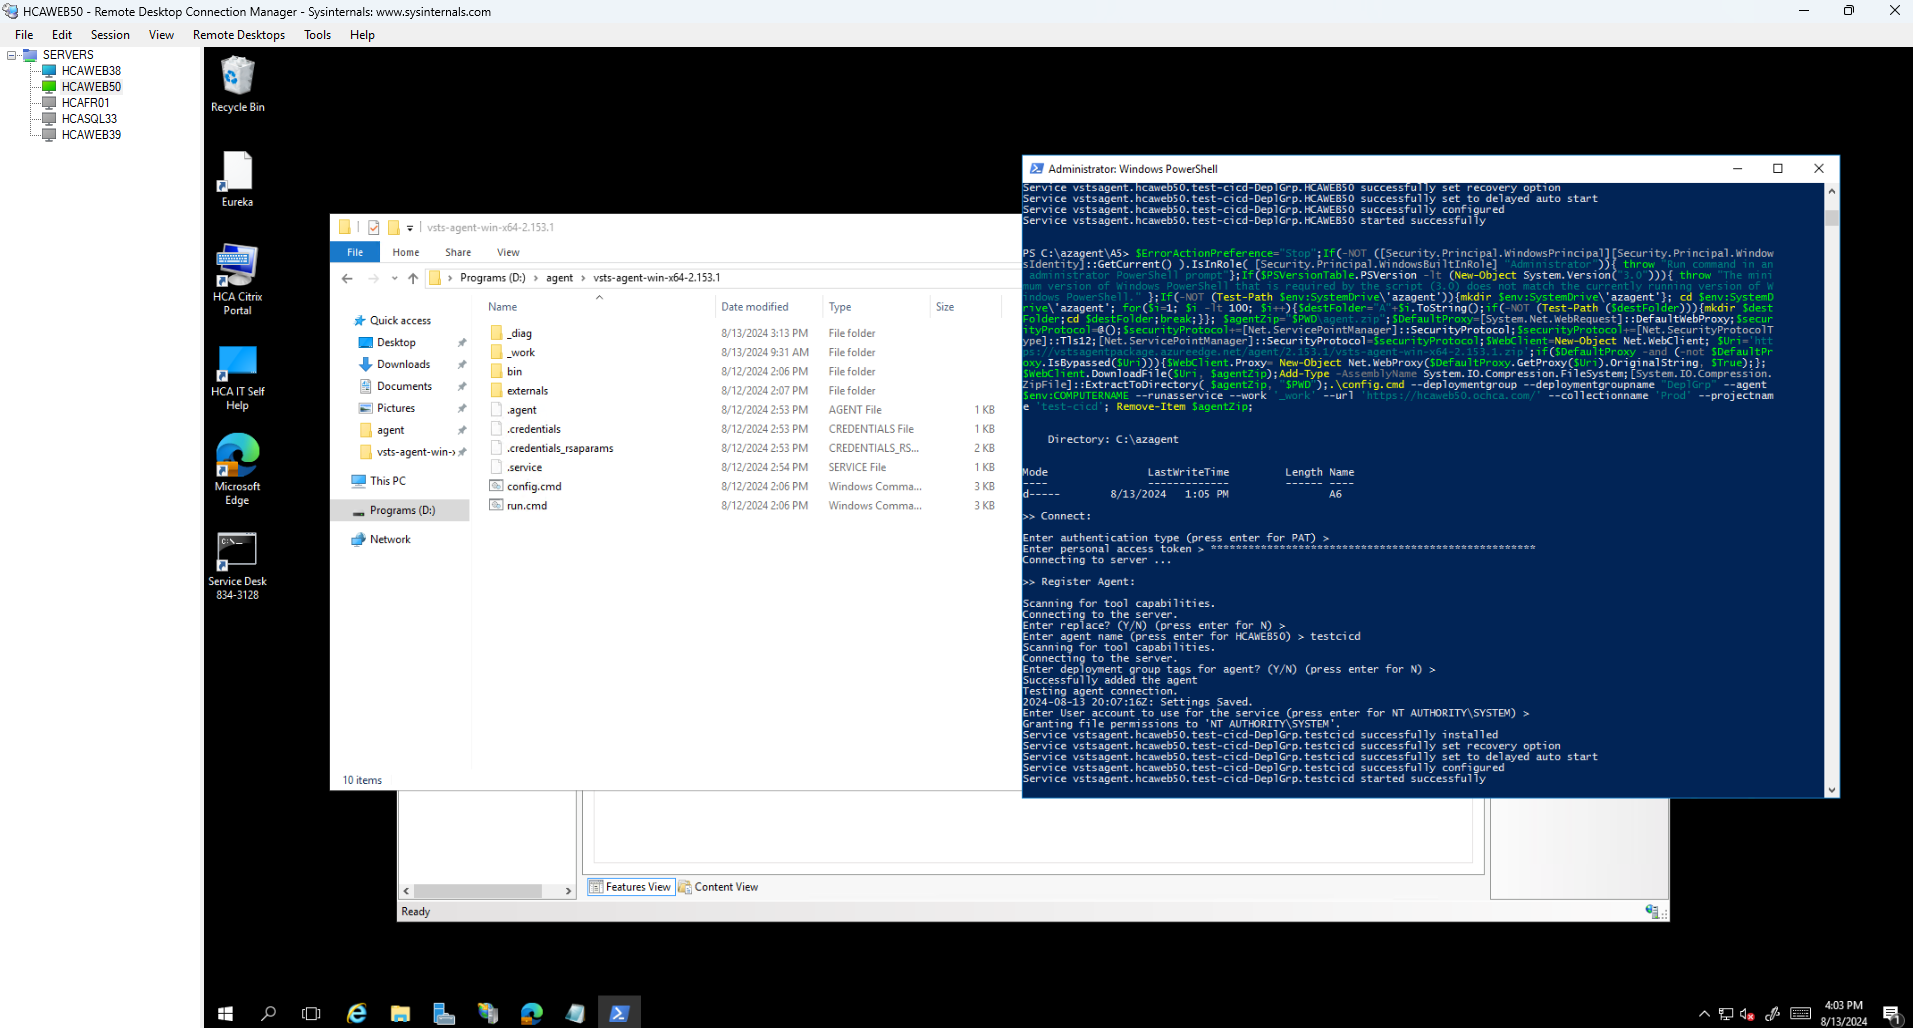
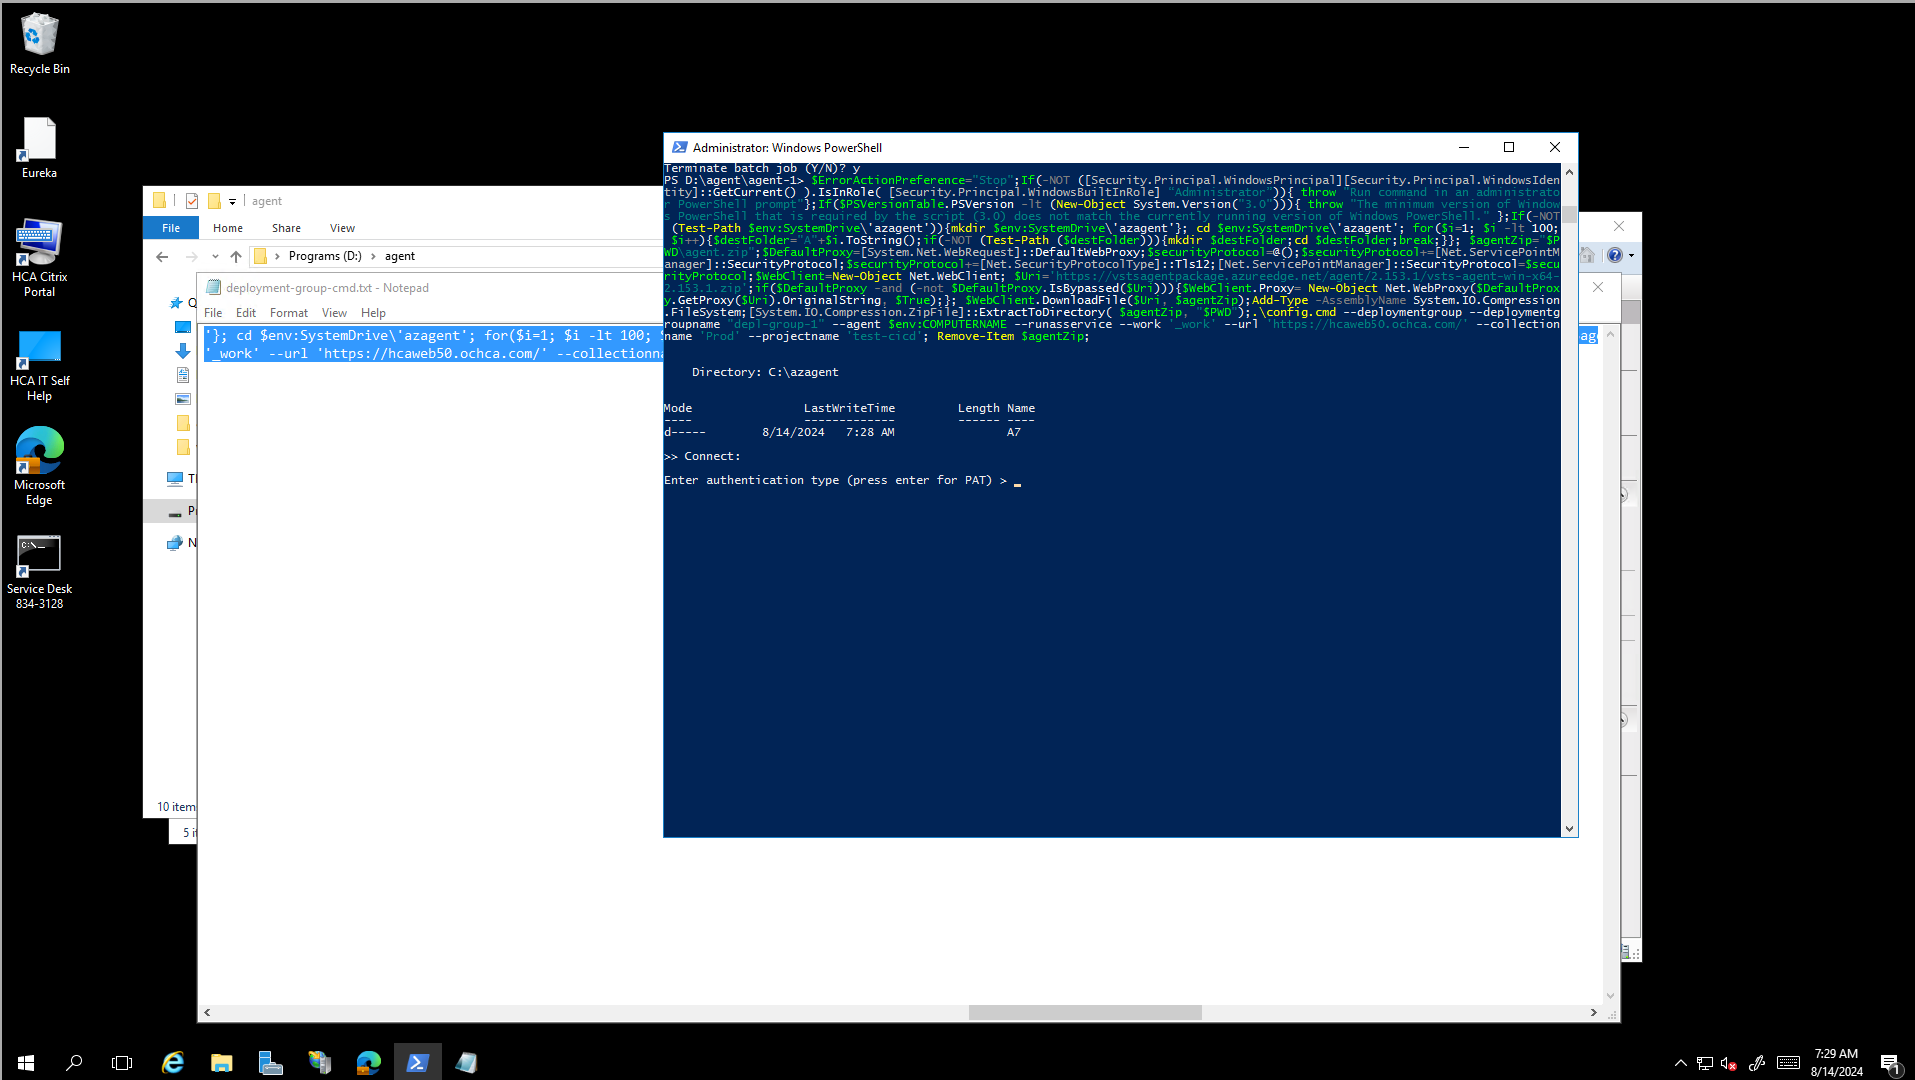
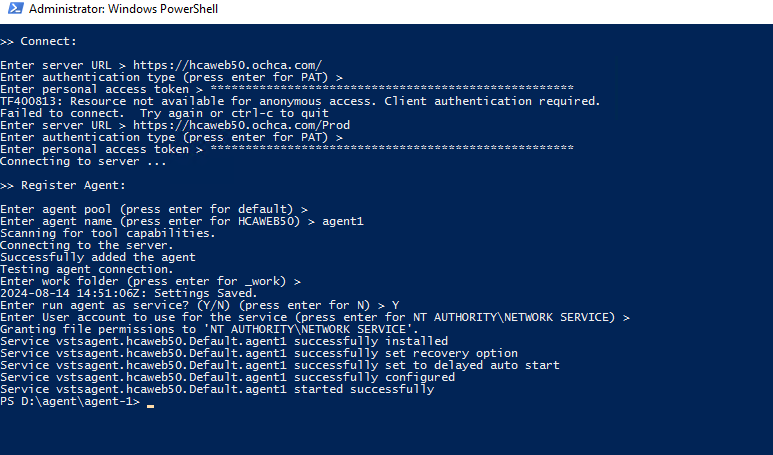
Create Agent in Windows Server
Now, log into the Windows Server that has Azure Devops deployed and open the powershell or CMD prompt as adminsistration. Note: Make sure to download the agent from the steps above, if you have not done so, use this Download the agent and place downloaded content on the server.

For the Server URL, we can find it inside the deployment group command (see above). it’s the --url in the command.
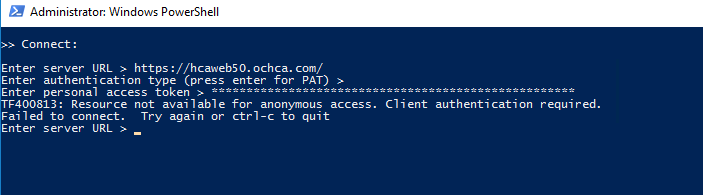
Note: we encounter Resource not available for anonymous access. Client authentication required.. Make sure the token is valid for specific url level. For example:
- If we entered the url
https://hcaweb50.ochca.com/, the token must have the organization set toAll Accessible Organization - If we entered the url
https://hcaweb50.ochca.com/Prod, the token must beProd
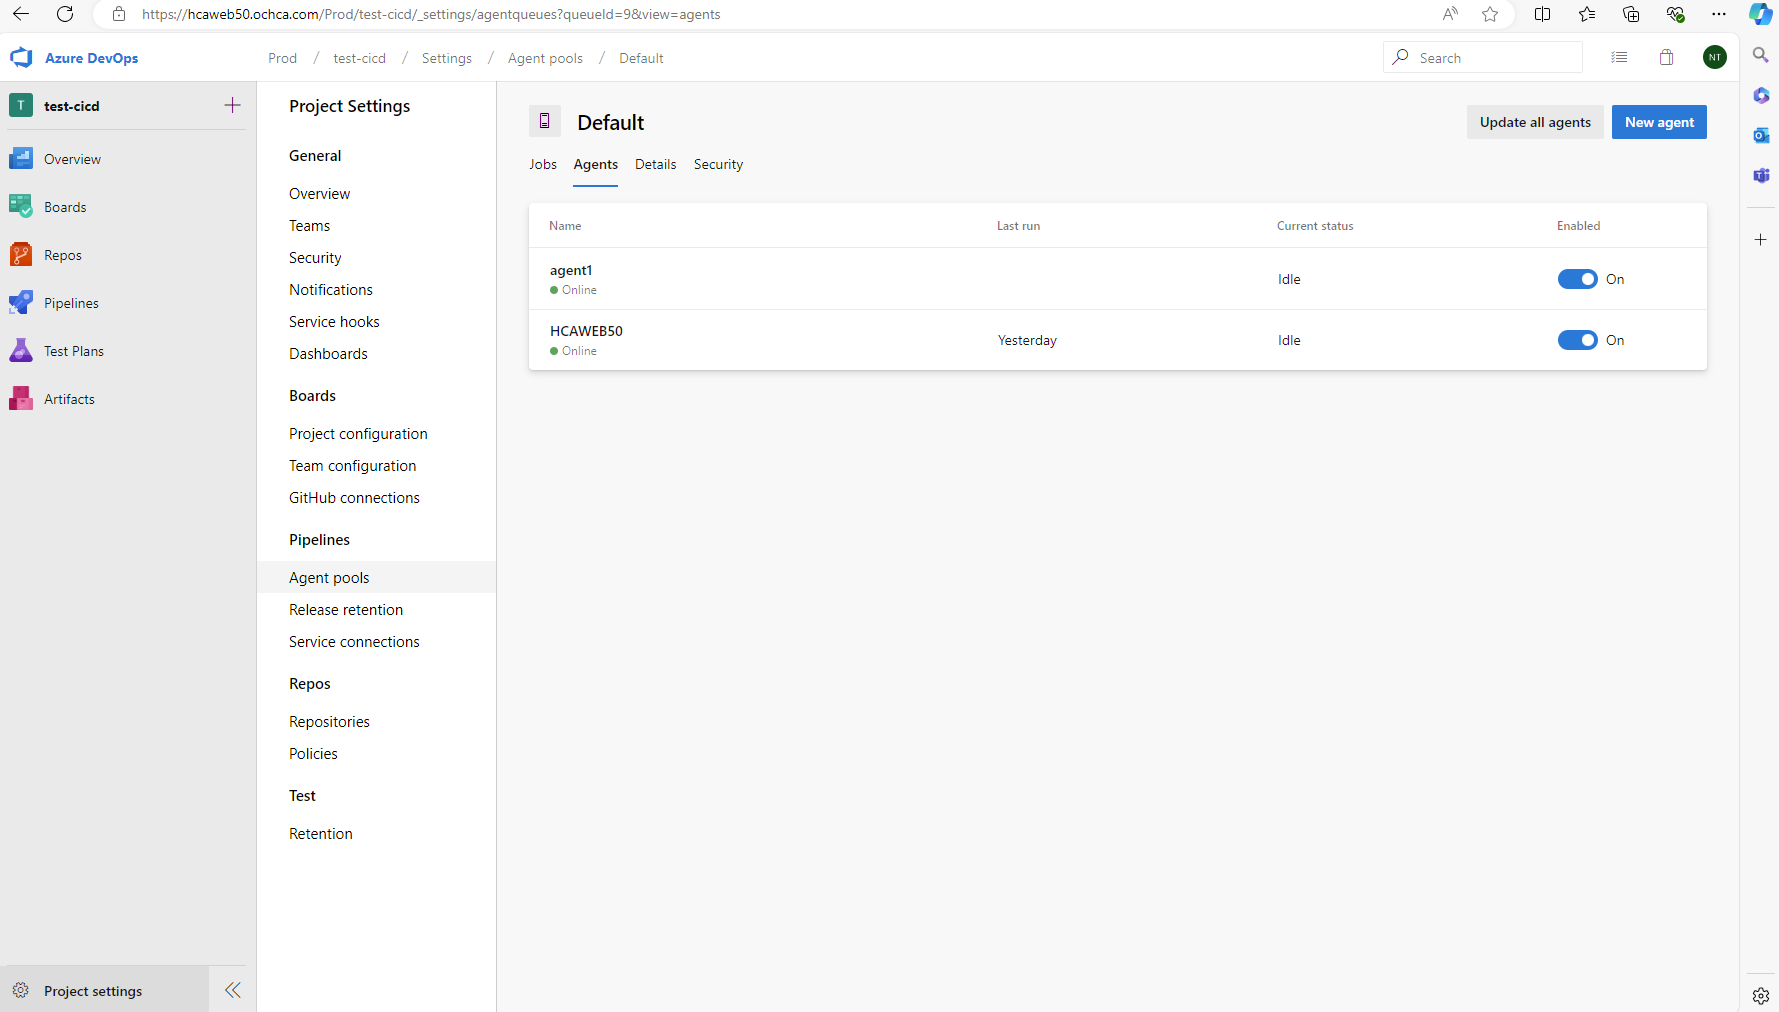
Success:
Go to the Azure DevOps UI to check, we will see the new agent is created.
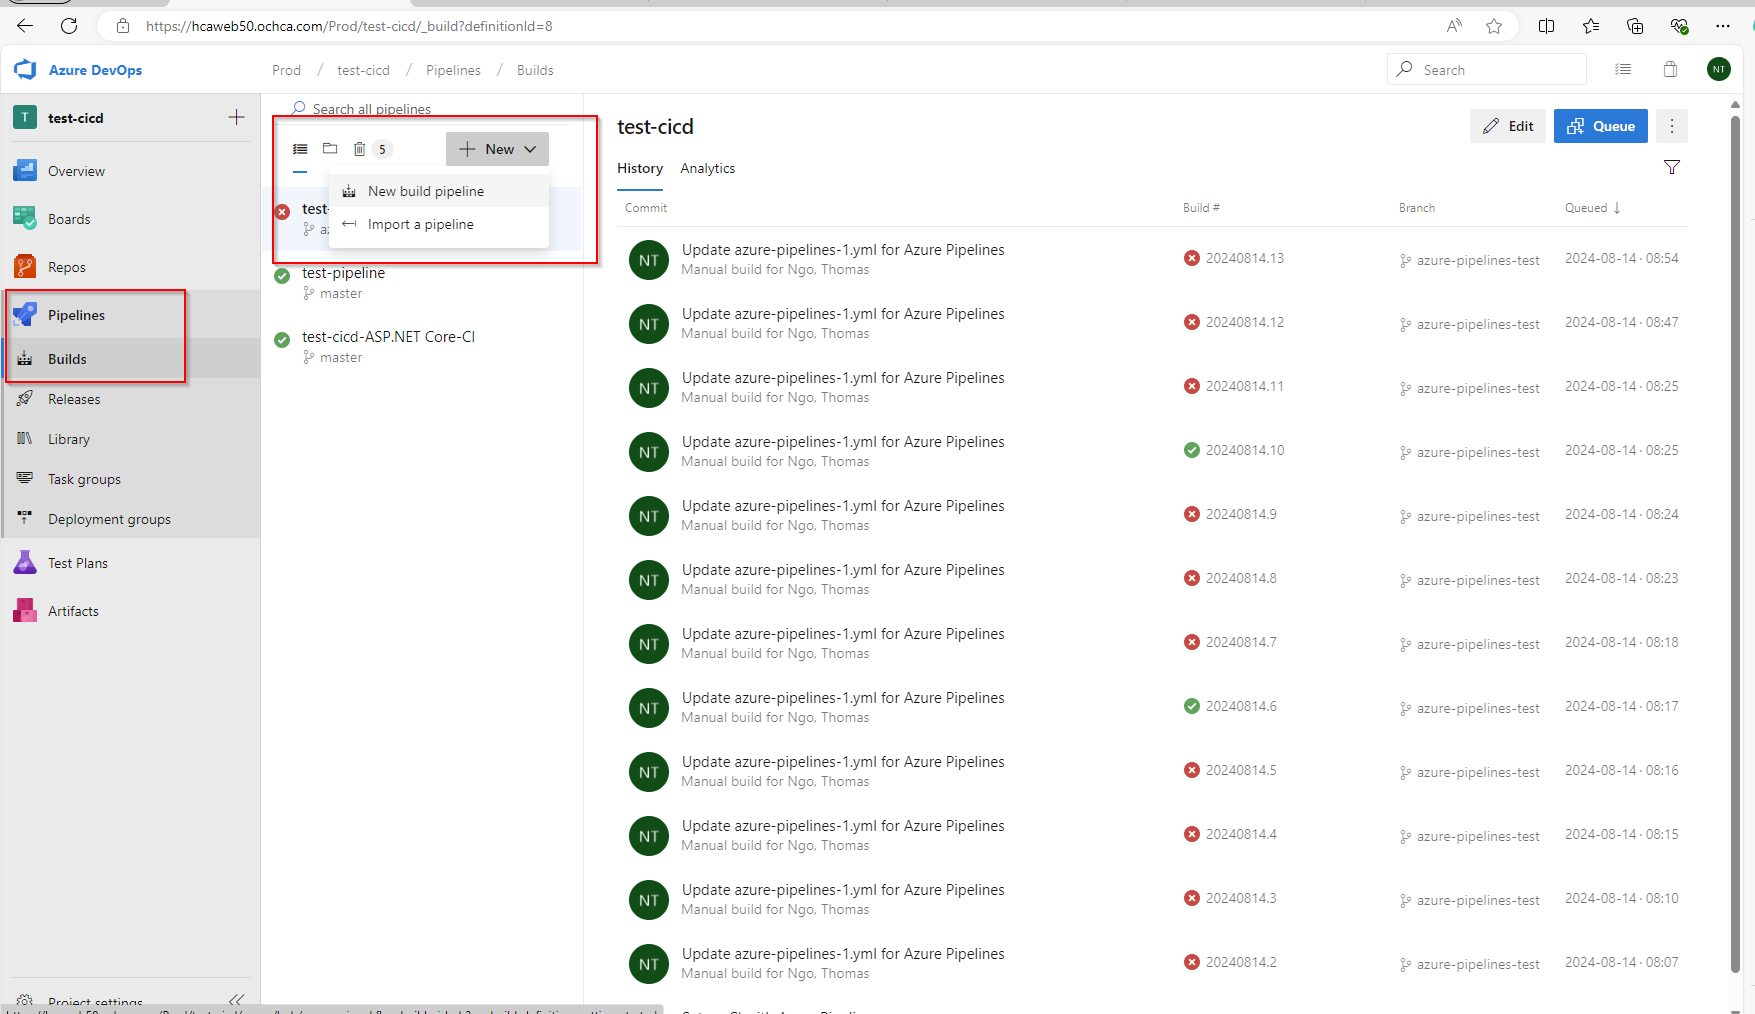
Set up Build Pipepline (CI - Continueous Integration)
Next, we need to set up the build pipeline.
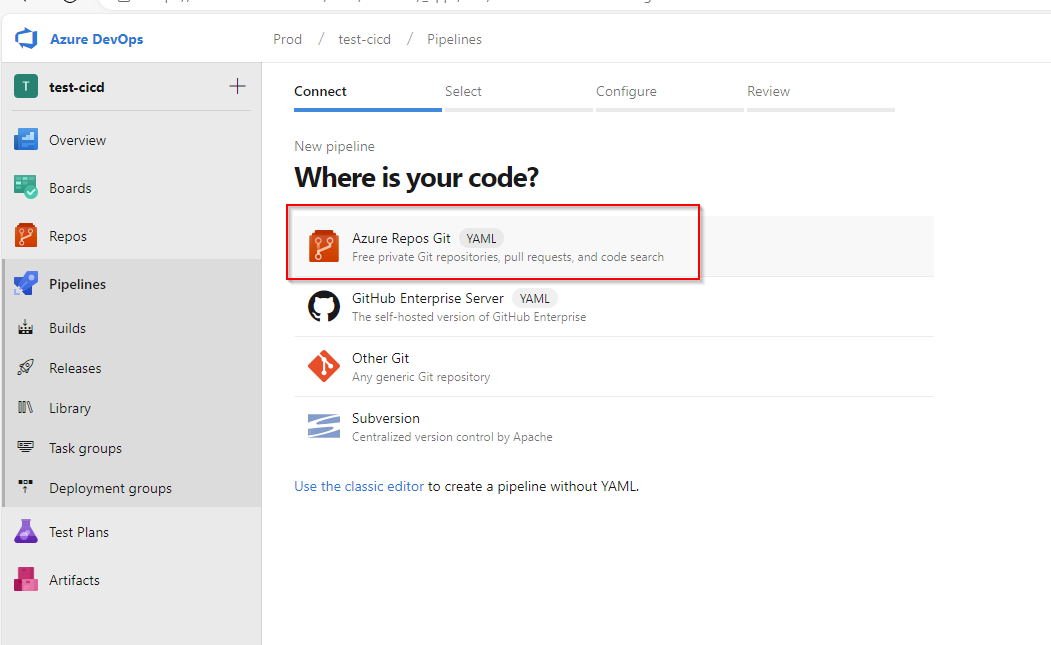
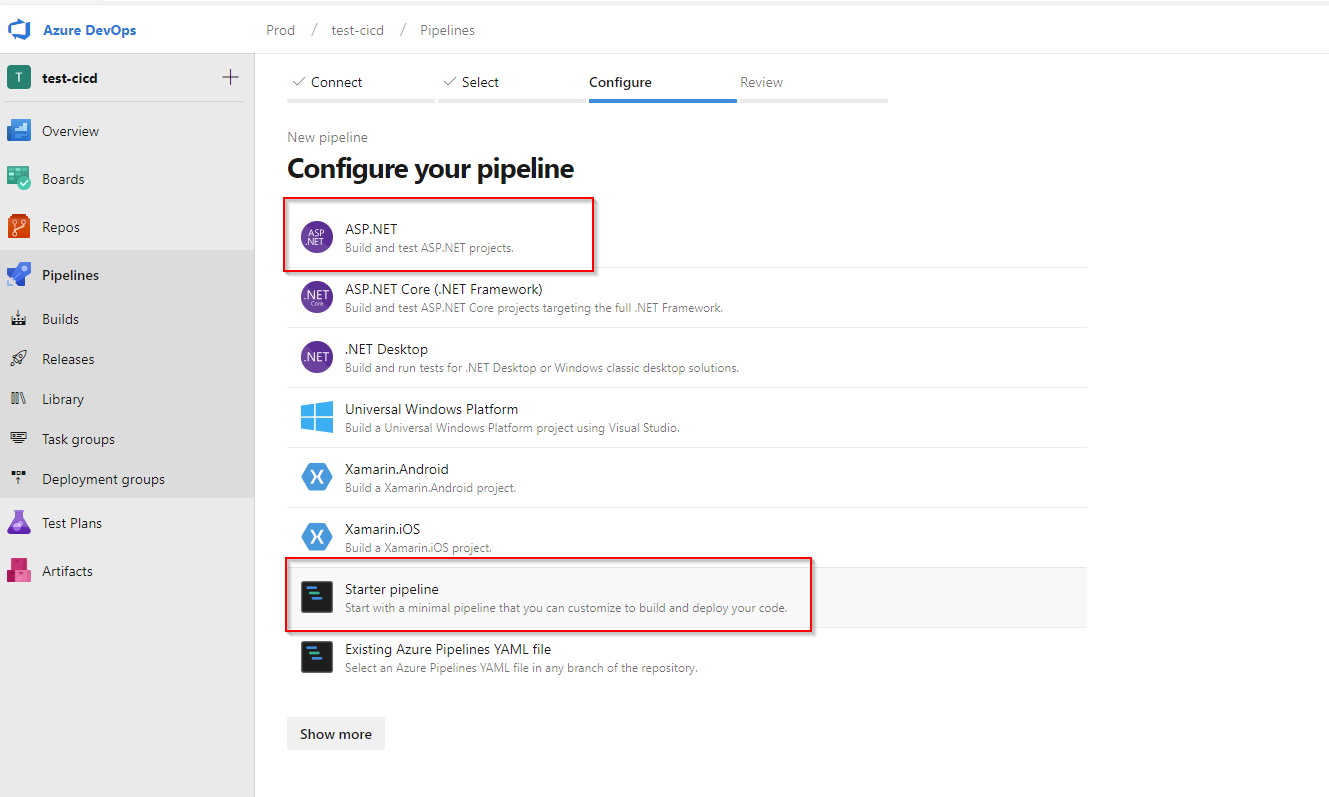
We can use minimal list for now.
Here is the sample of pipeline to build, publish and create artifacts. Copy and paste this template into the yaml pipeline.
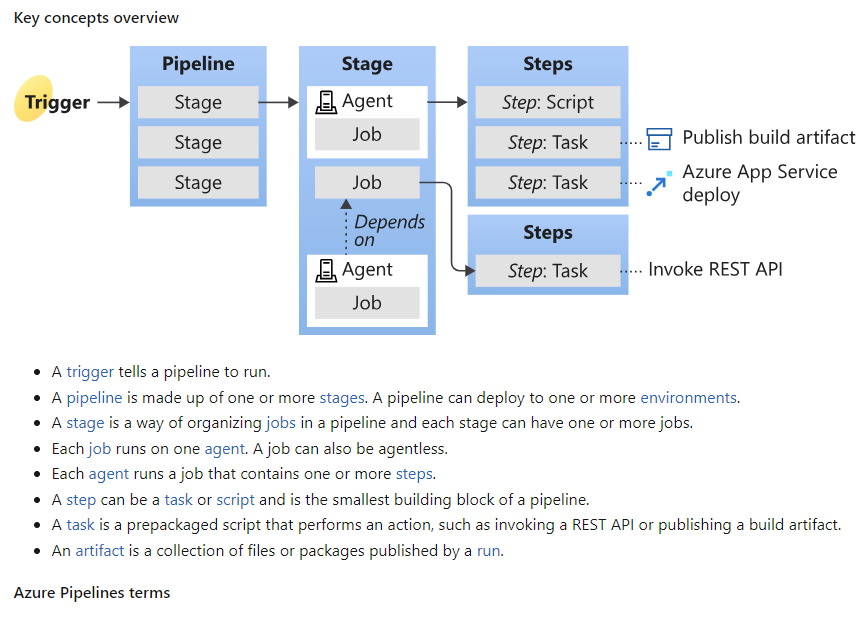
To understand the yaml, we can read the key concepts
# Start with a minimal pipeline that you can customize to build and deploy your code.
# Add steps that build, run tests, deploy, and more:
# https://aka.ms/yaml

trigger:
- master

pool:
  name: default
  demands:
  - Agent.Version -gtVersion 2.153.1
  - Agent.Name -equals agent1

variables:
  solution: '**/*.sln'
  buildPlatform: 'Any CPU'
  buildConfiguration: 'Release'

steps:
- task: DotNetCoreCLI@2
  inputs:
    command: 'build'
    projects: '$(solution)'
    configuration: '$(buildConfiguration)'

- task: DotNetCoreCLI@2
  inputs:
    command: 'publish'
    publishWebProjects: true
    zipAfterPublish: false
    arguments: '--configuration $(buildConfiguration) --output $(Build.ArtifactStagingDirectory)'

- task: DotNetCoreCLI@2
  displayName: Publish
  inputs:
    command: publish
    publishWebProjects: True
    arguments: '--configuration $(BuildConfiguration) --output $(build.artifactstagingdirectory)'
    zipAfterPublish: false

- task: PublishBuildArtifacts@1
  displayName: 'Publish Artifact'
  inputs:
    PathtoPublish: '$(build.artifactstagingdirectory)'
    ArtifactName: publish
  condition: succeededOrFailed()
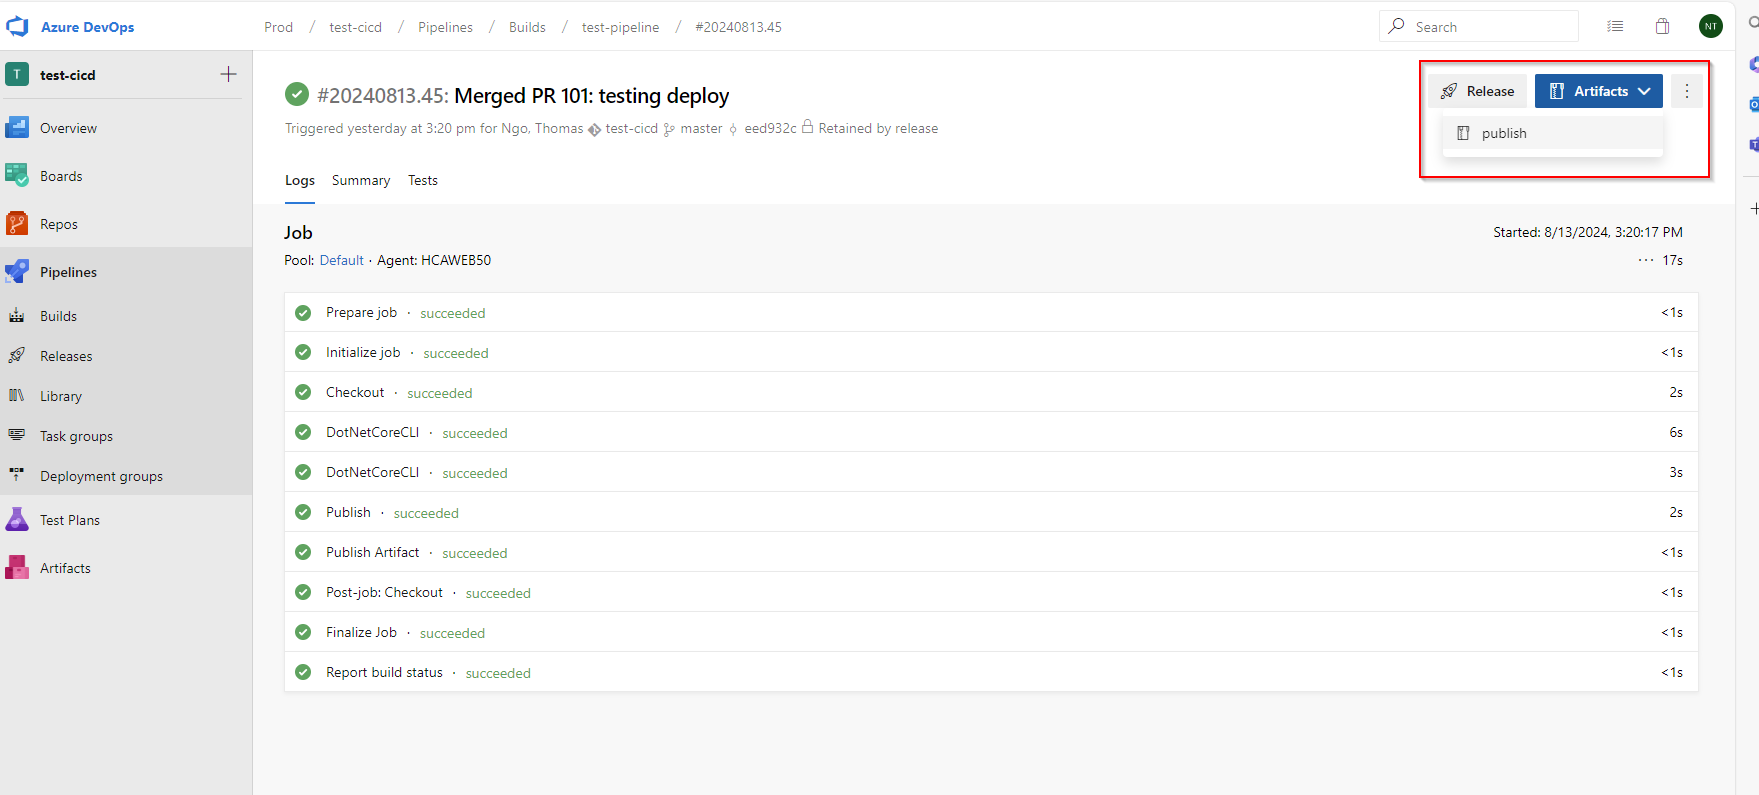
Click on Save and Run the build pipeline. It will show you success or fail.
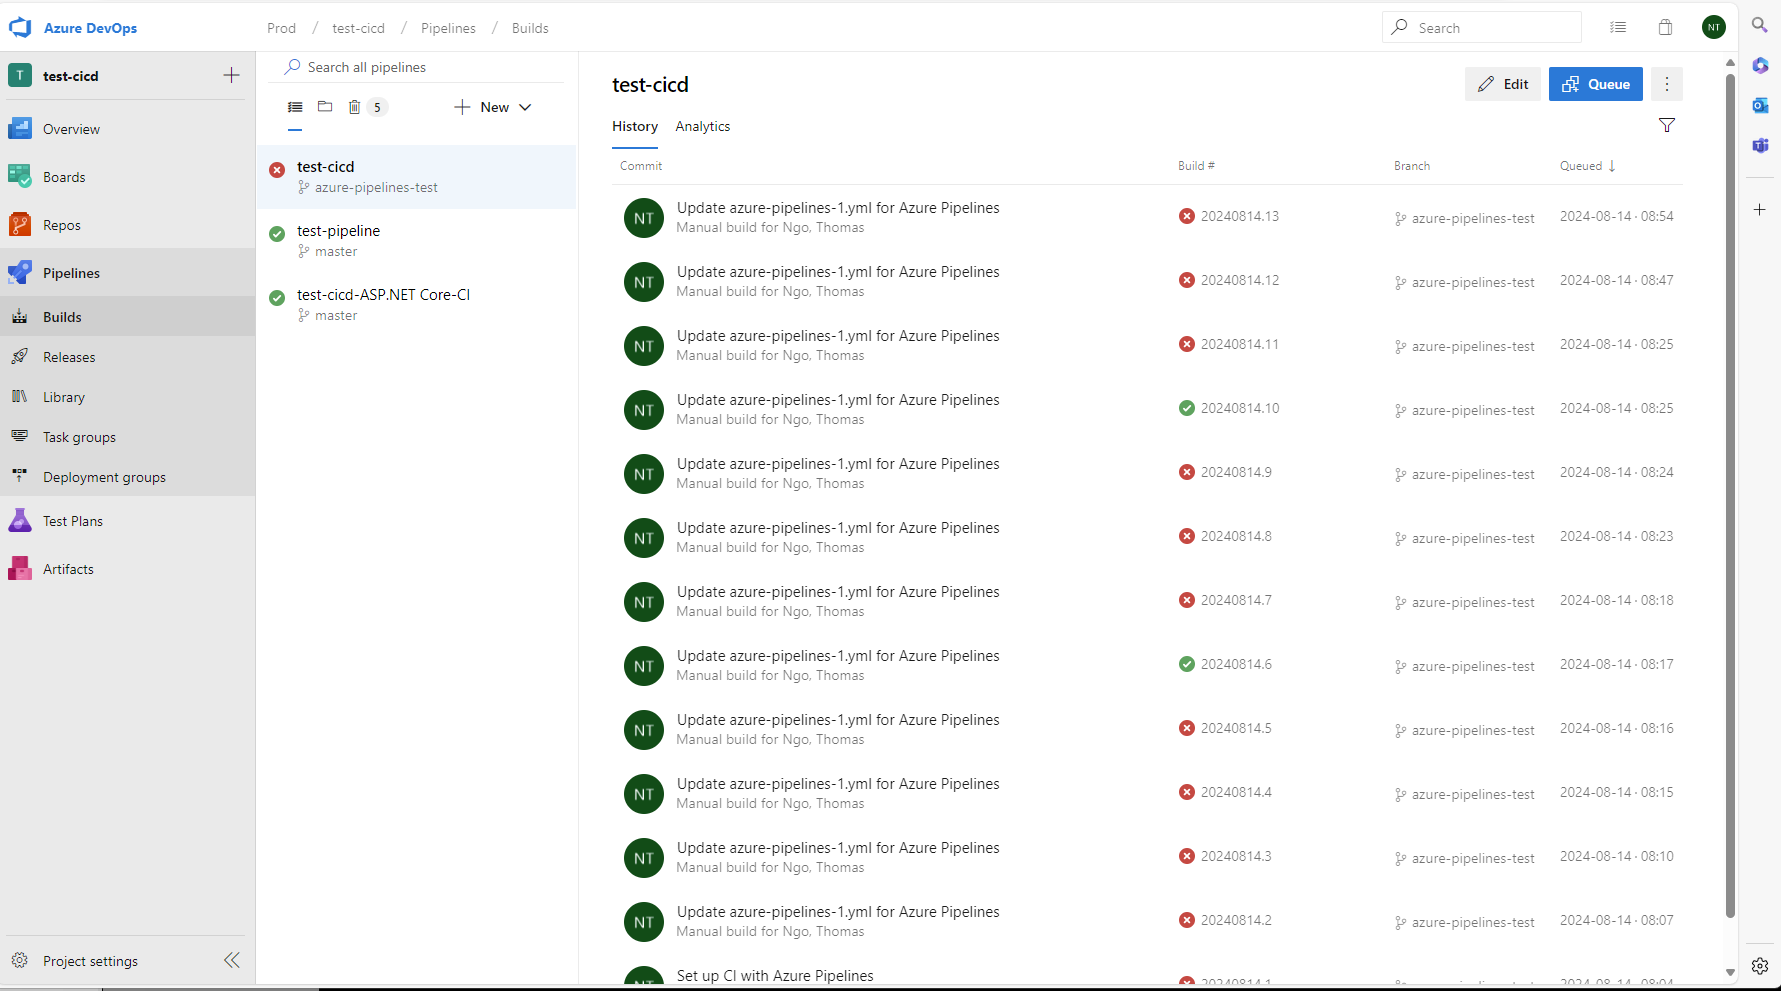
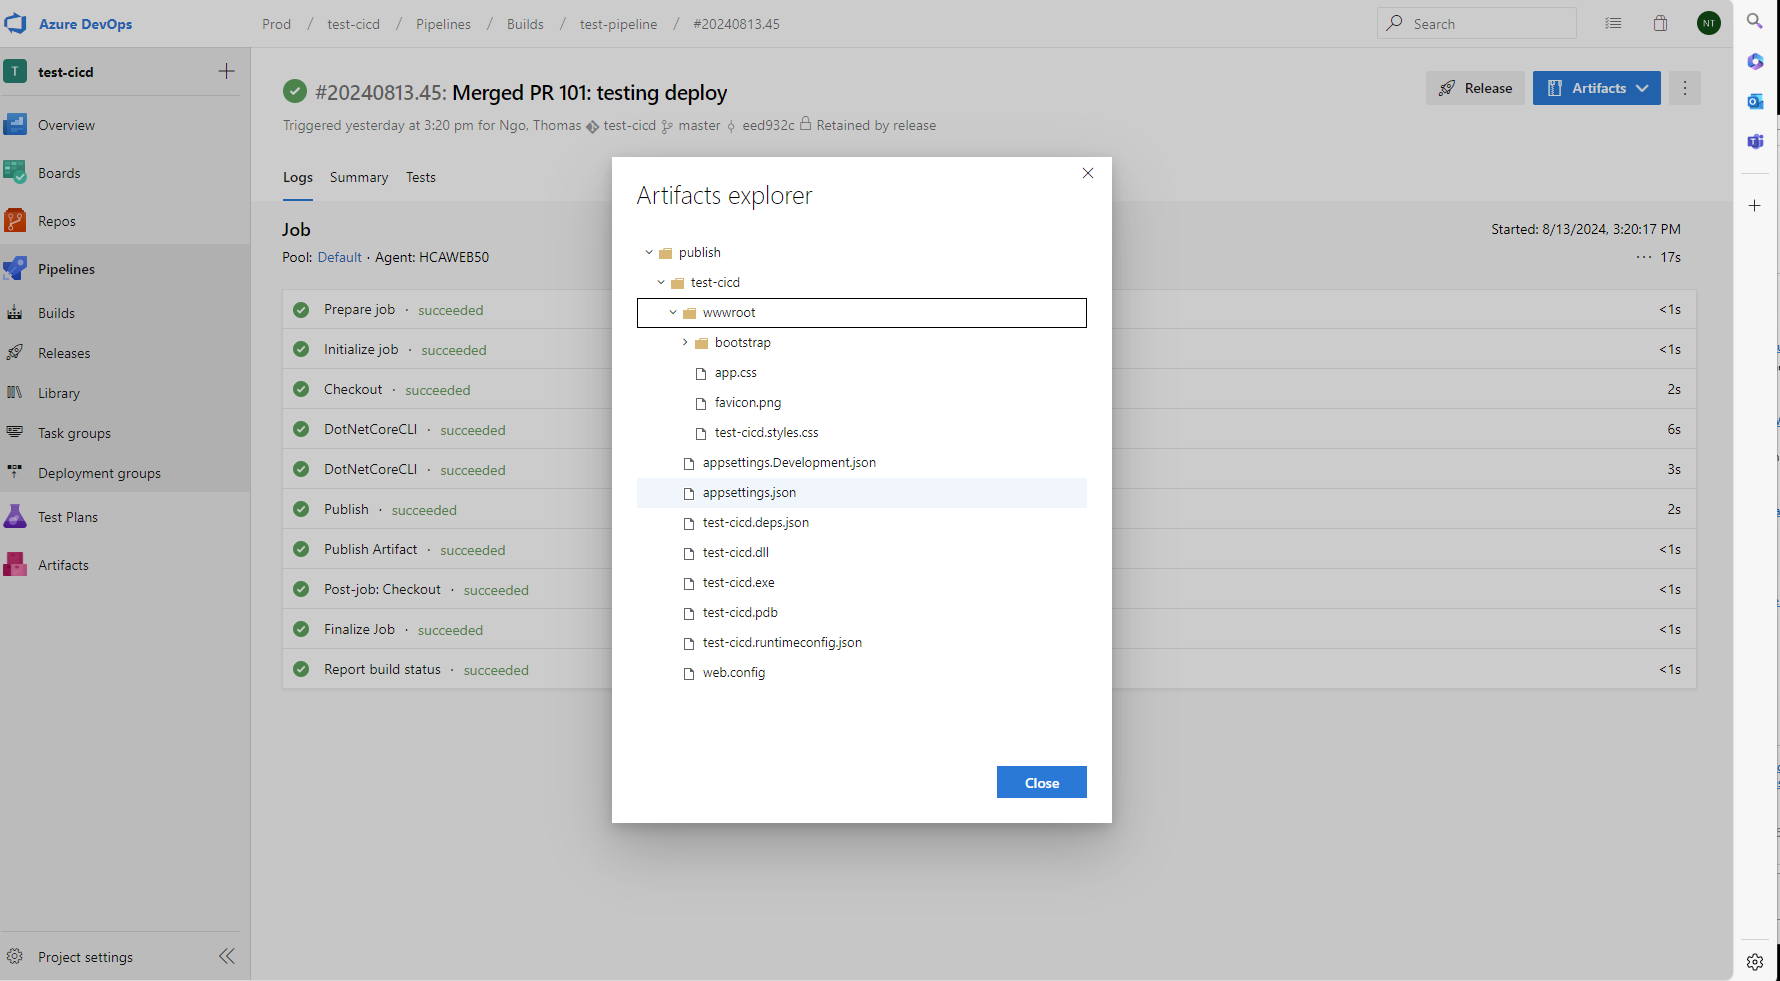
If the build is success, we can click on the build history and check the artifact.
Set up Release Pipepline (CD - Continueous Deployment)
Next, we create the Release Pipeline and deploy to IIS.
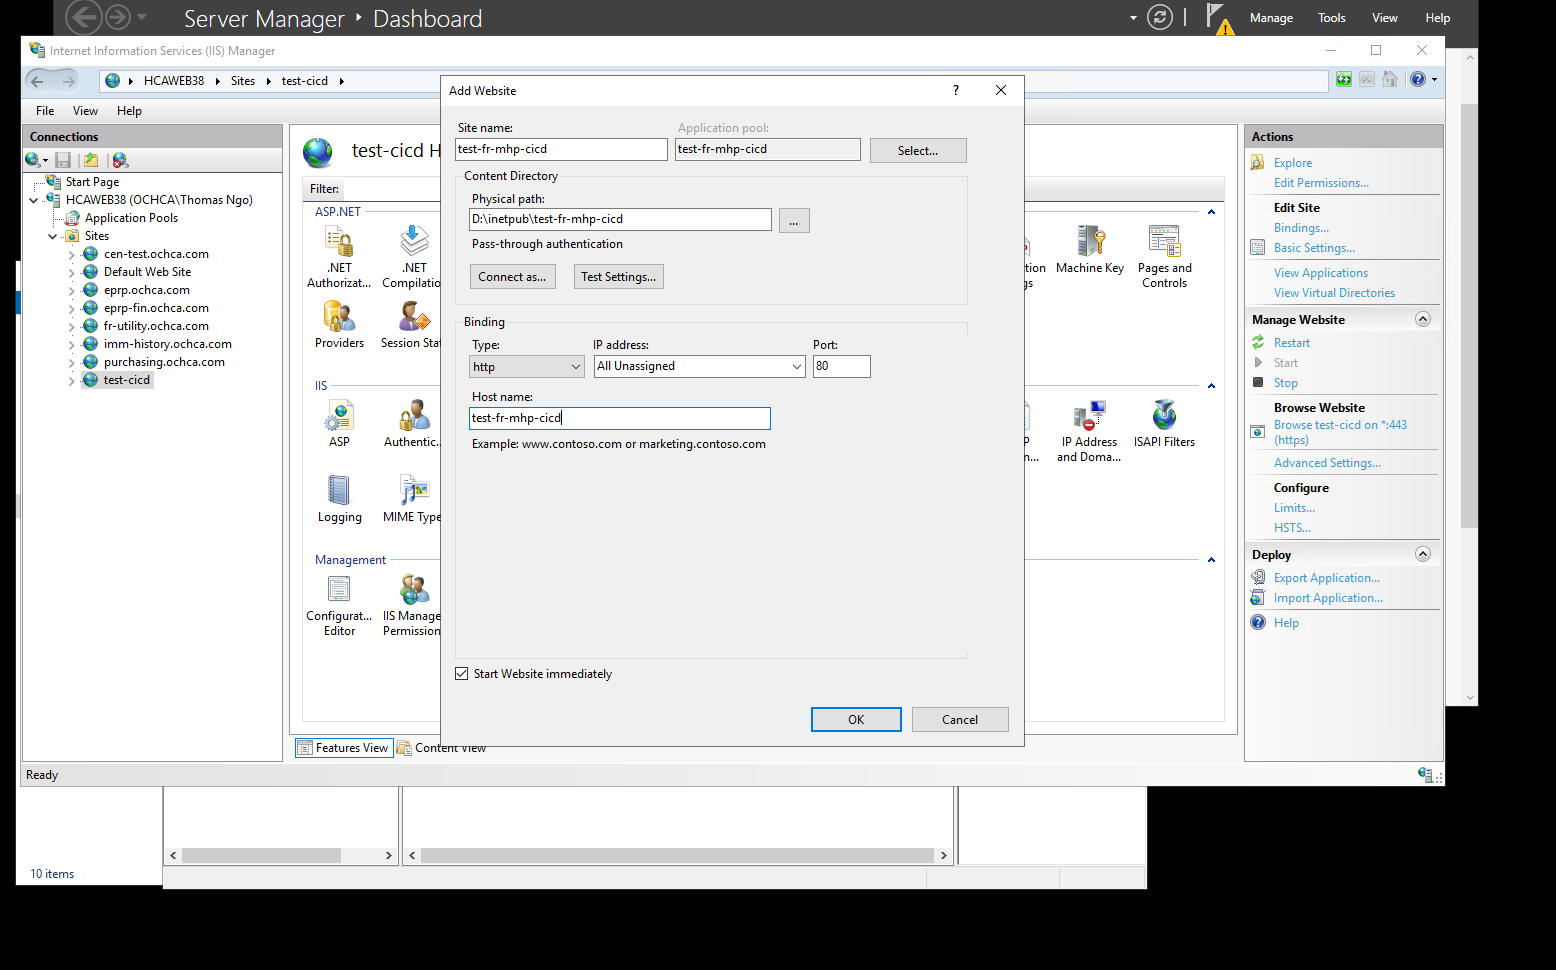
Create a new website on IIS
First, we need to create the new site on the windows server using IIS
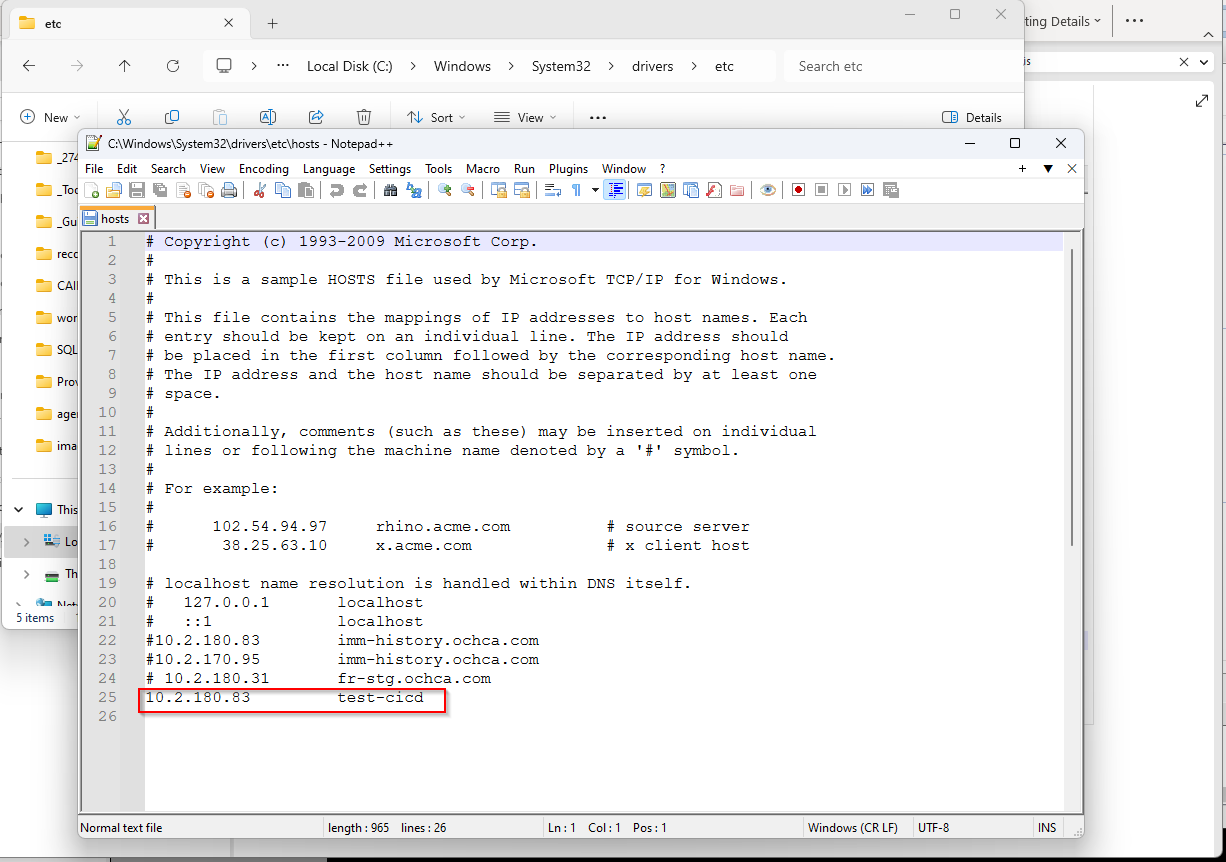
On our developmentt machine or local machine, go to C:\Windows\System32\drivers\etc and edit this file to map the ip address to the name of the website
Example:
Create Release Pipeline
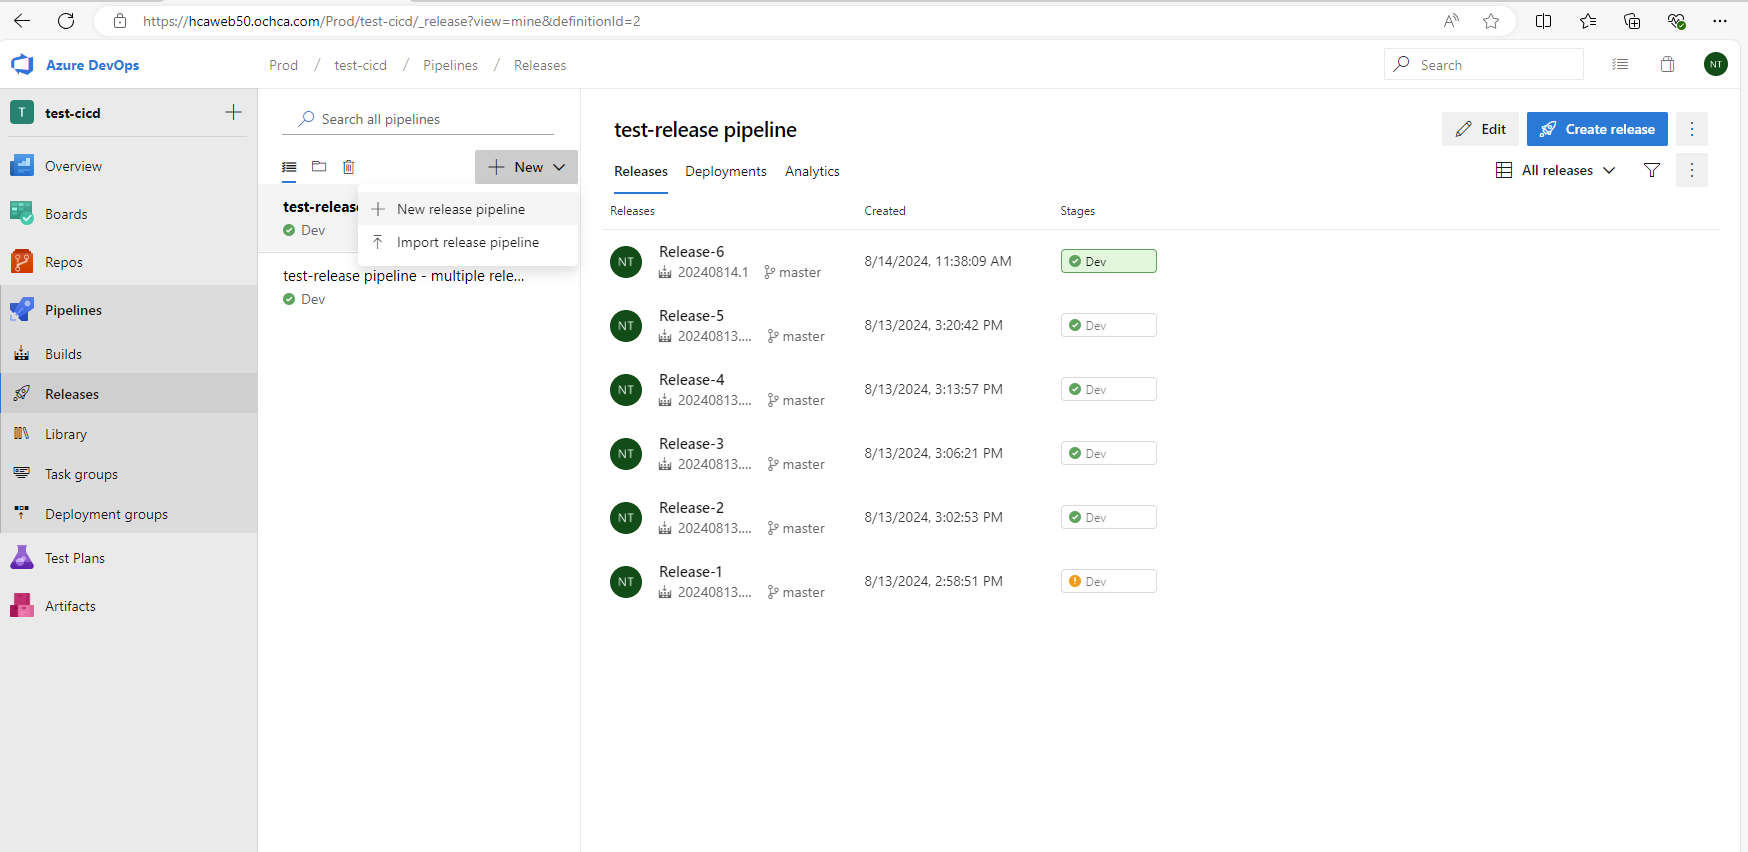
To create the release pipeline, we need to configure 2 main things:
- Artifacts
- Stages (Deploy jobs)
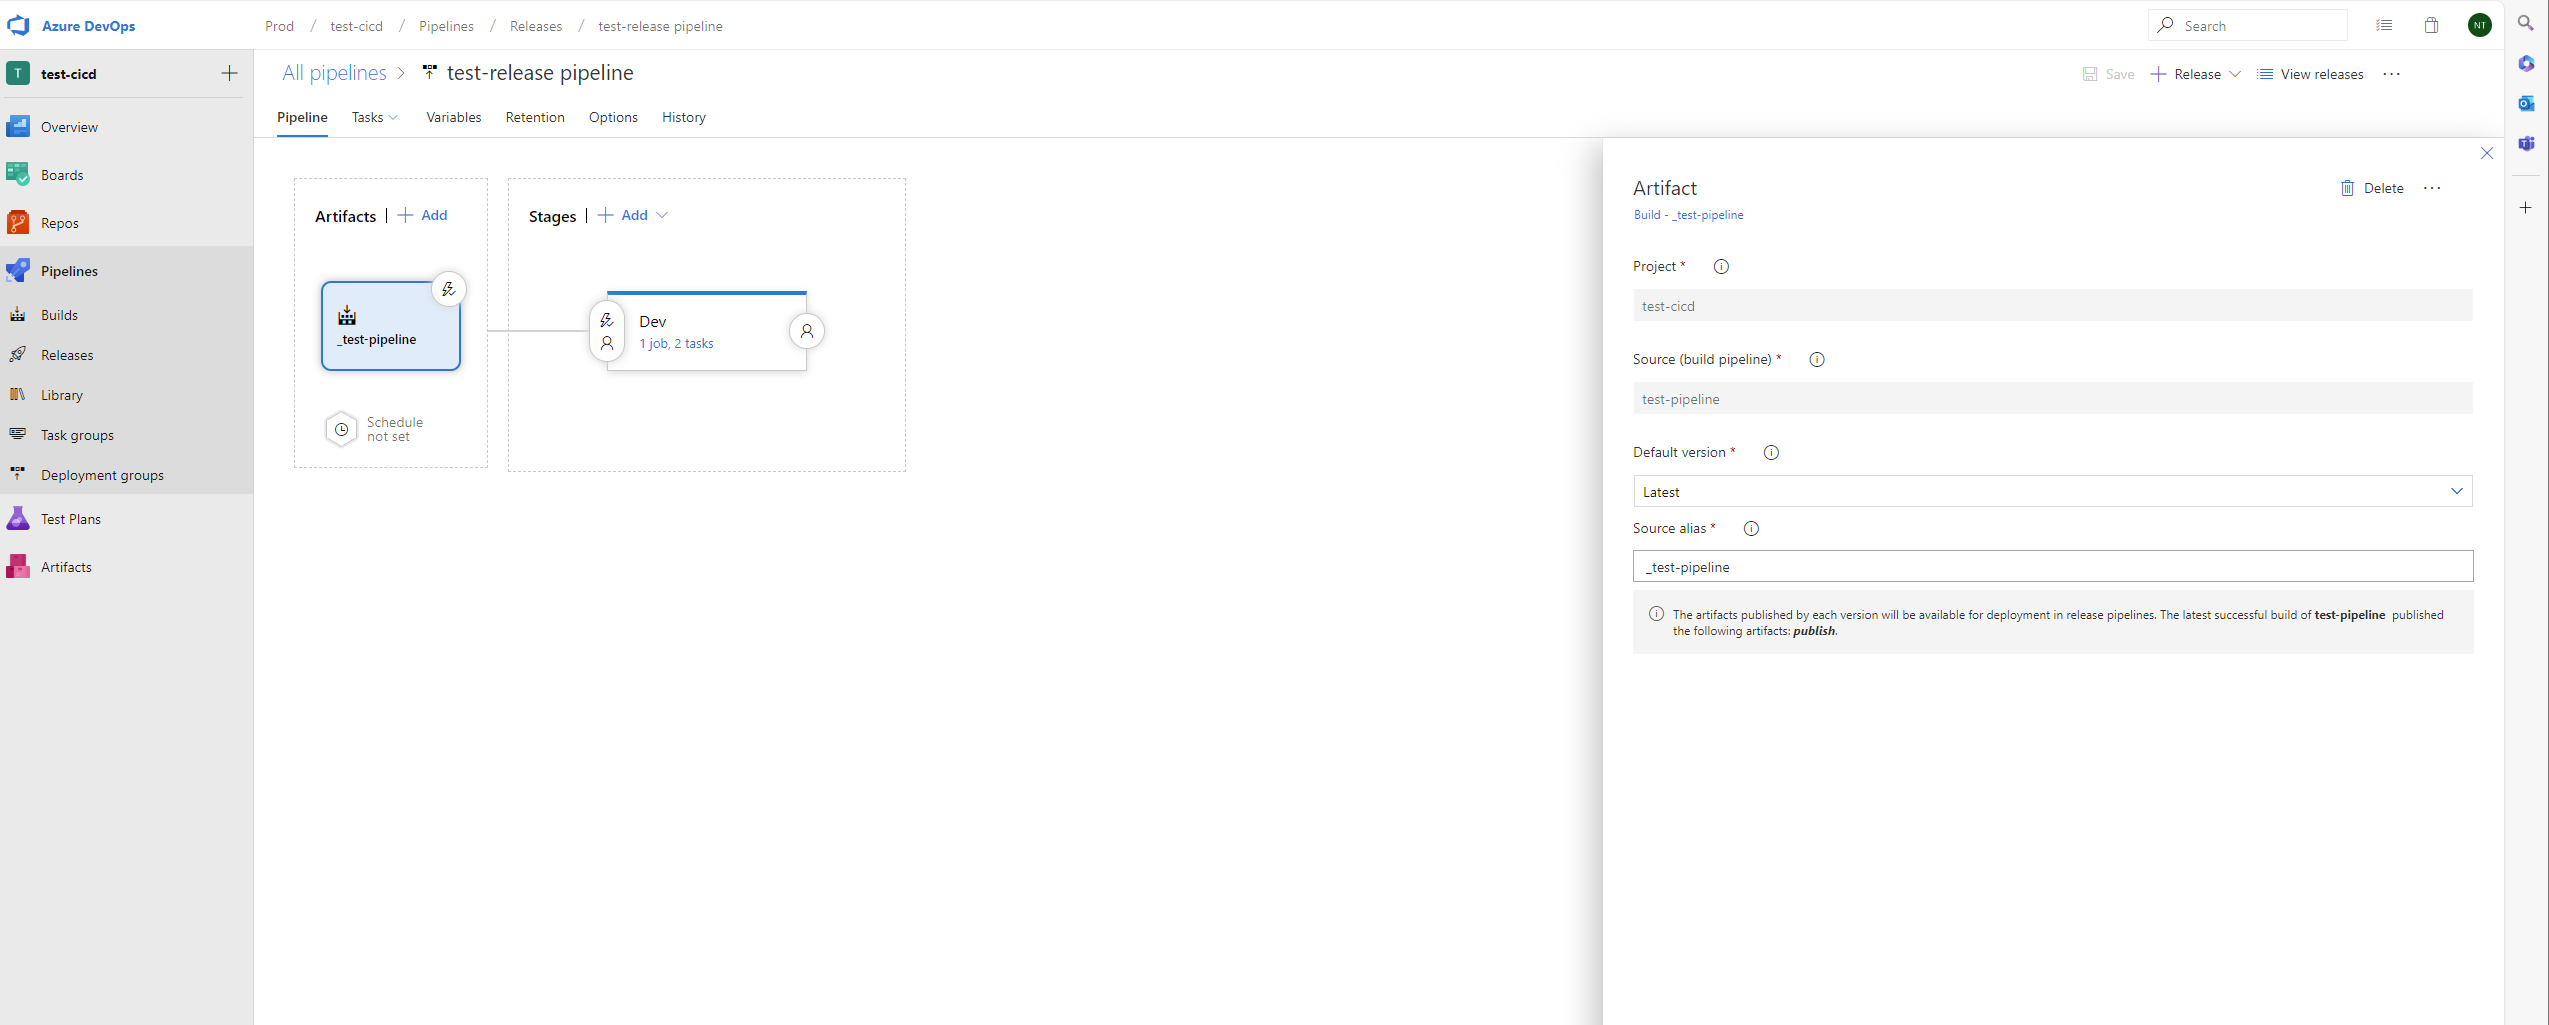
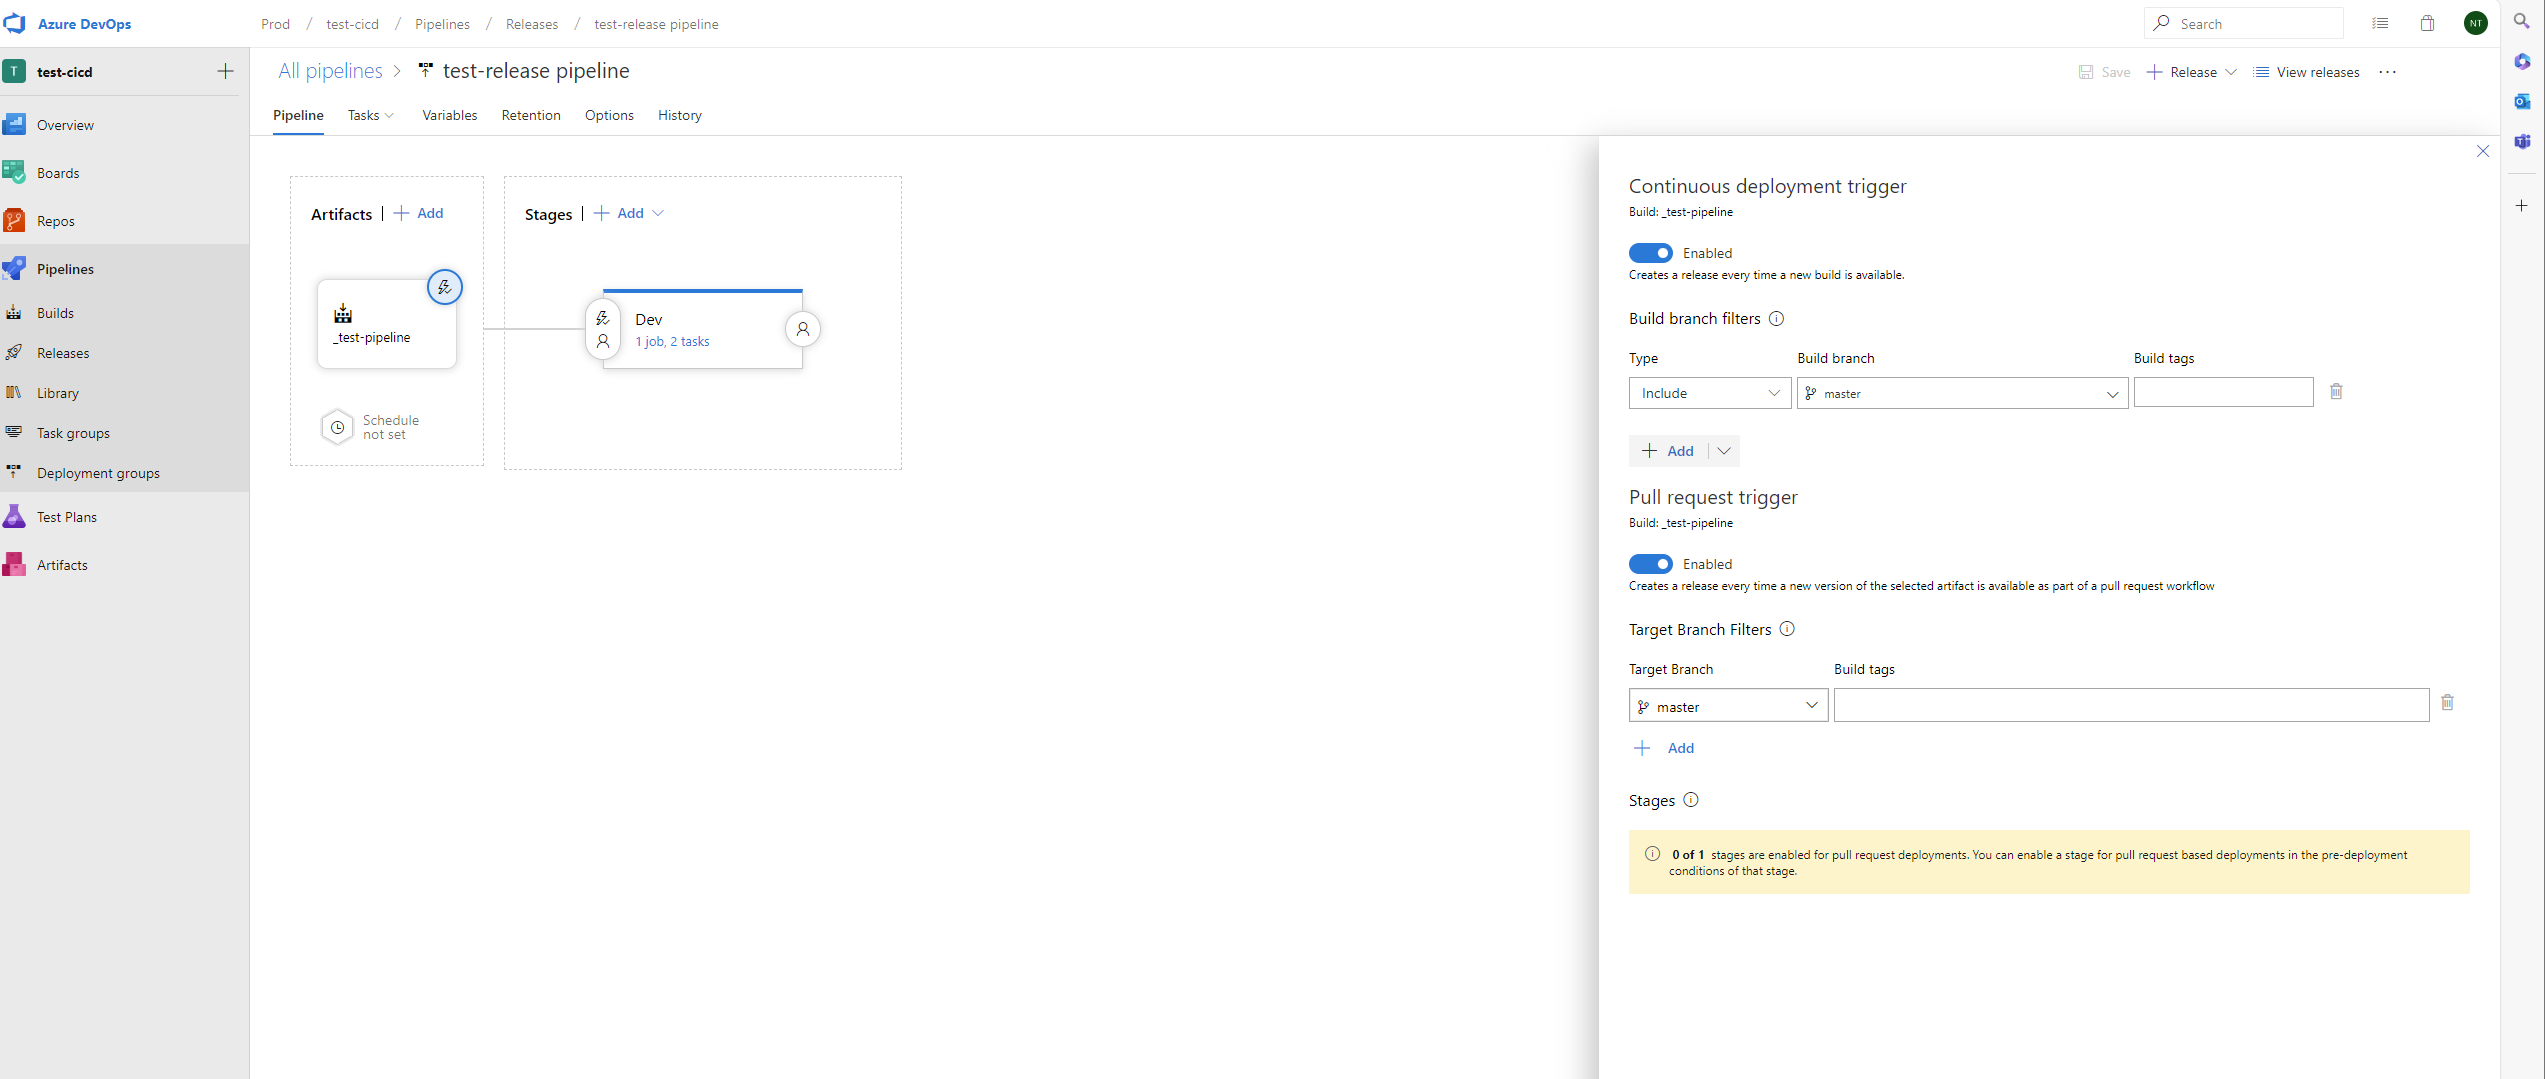
Artifacts
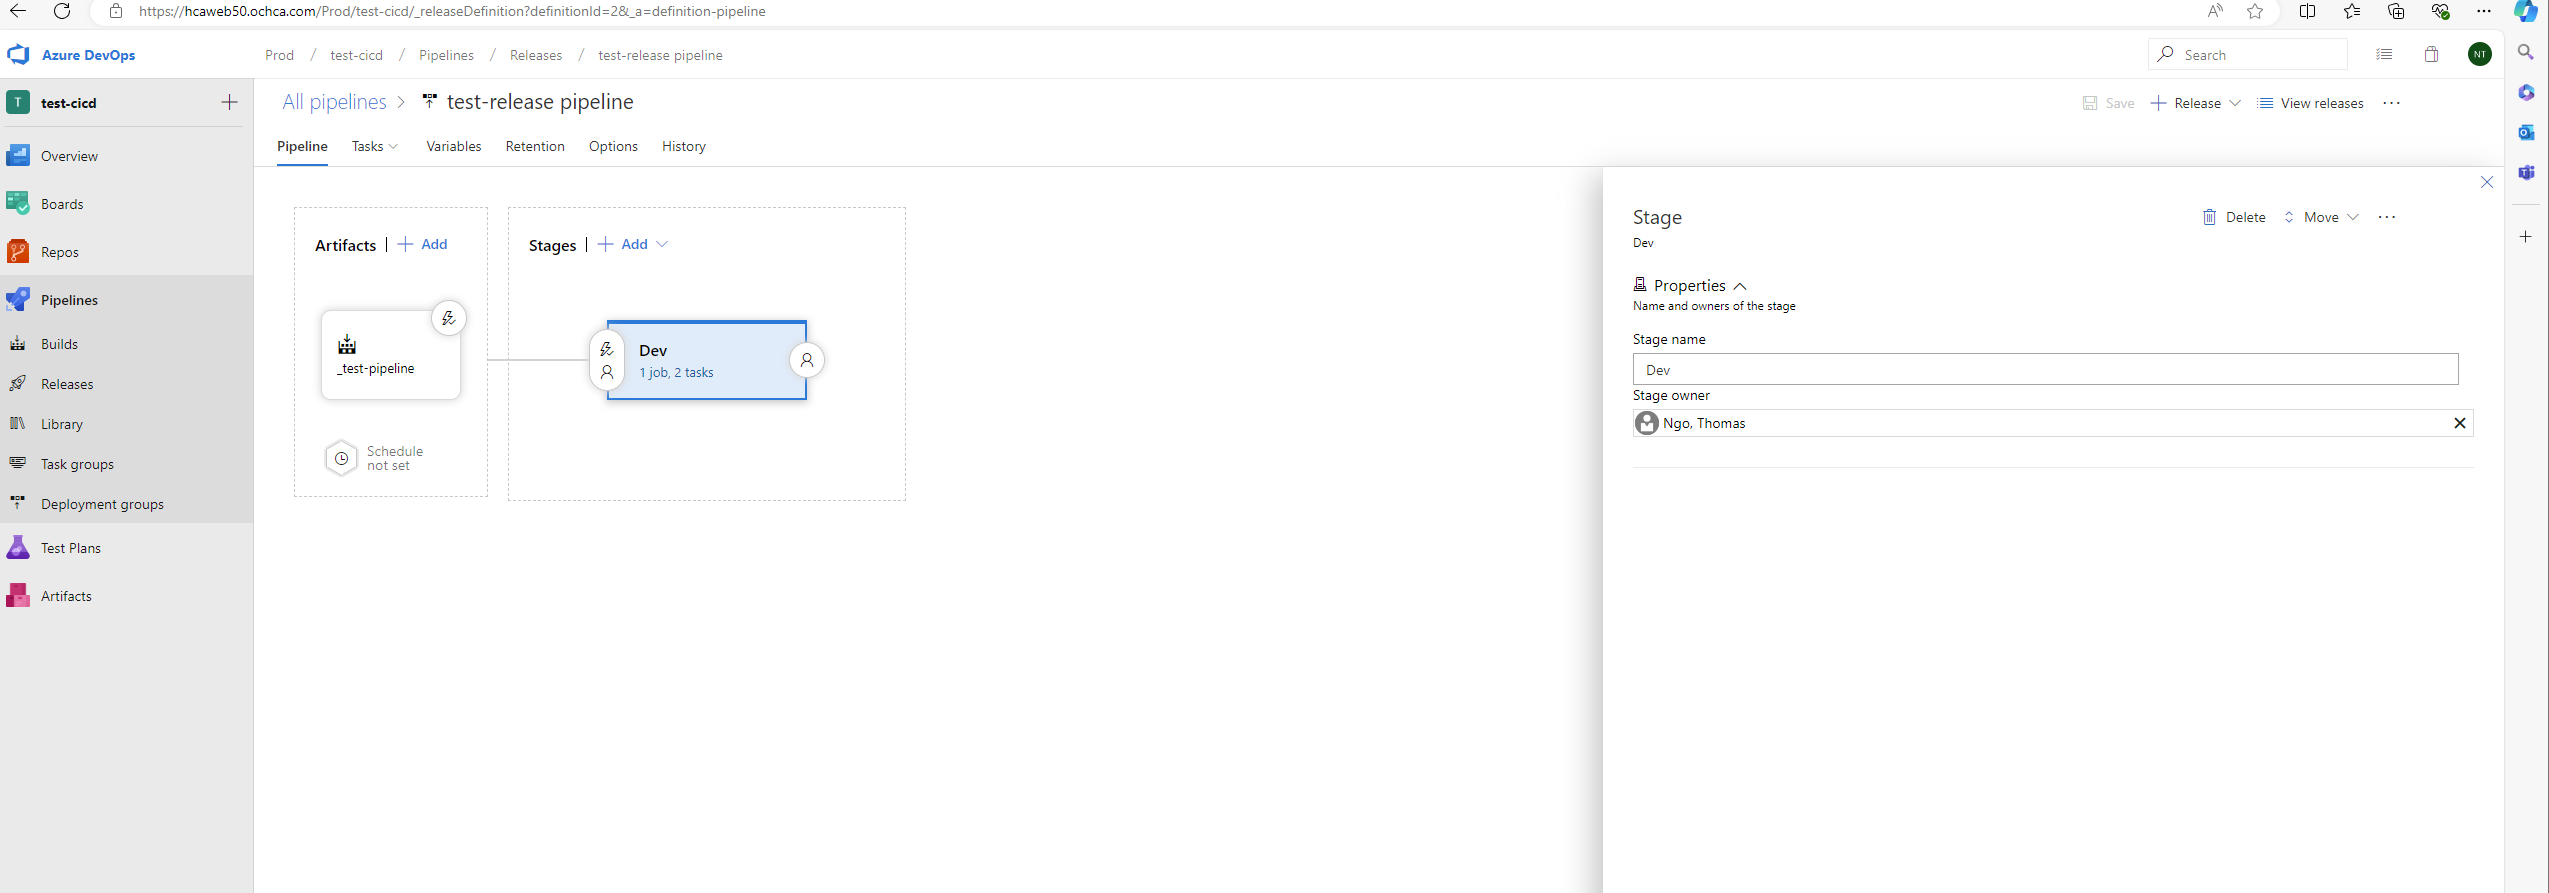
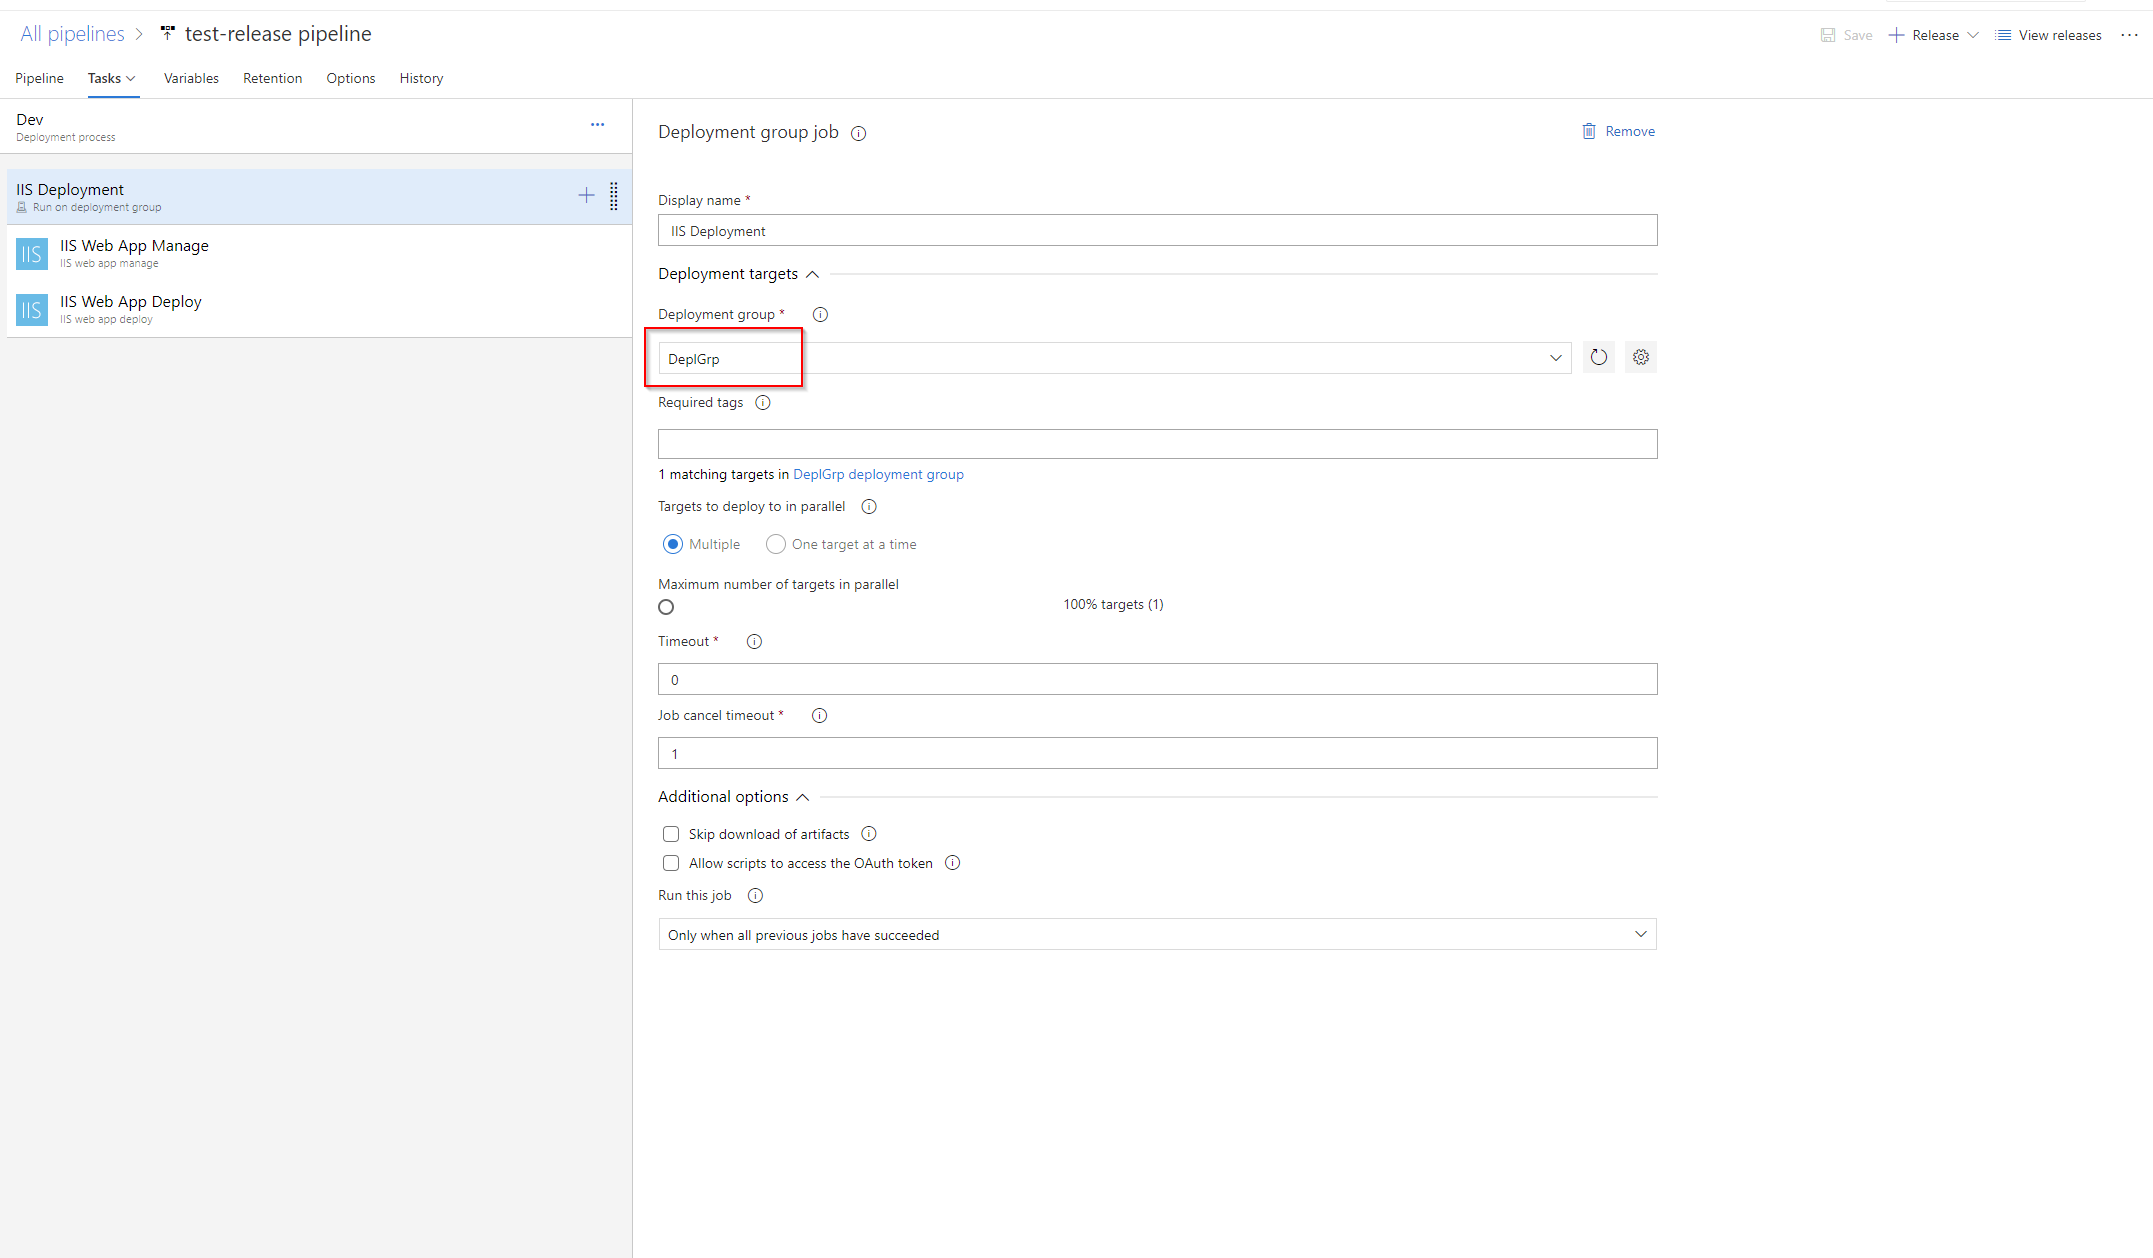
Stages
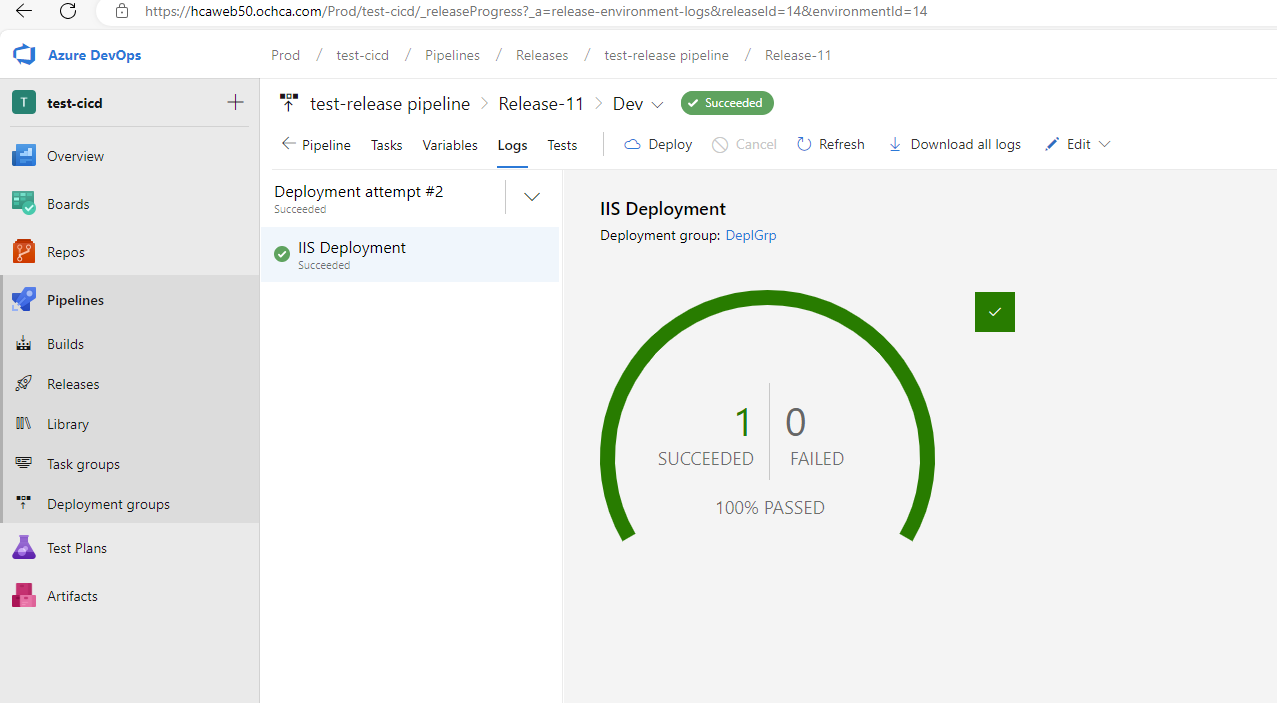
If the release pipeline runs successfully, we will see the following UI.

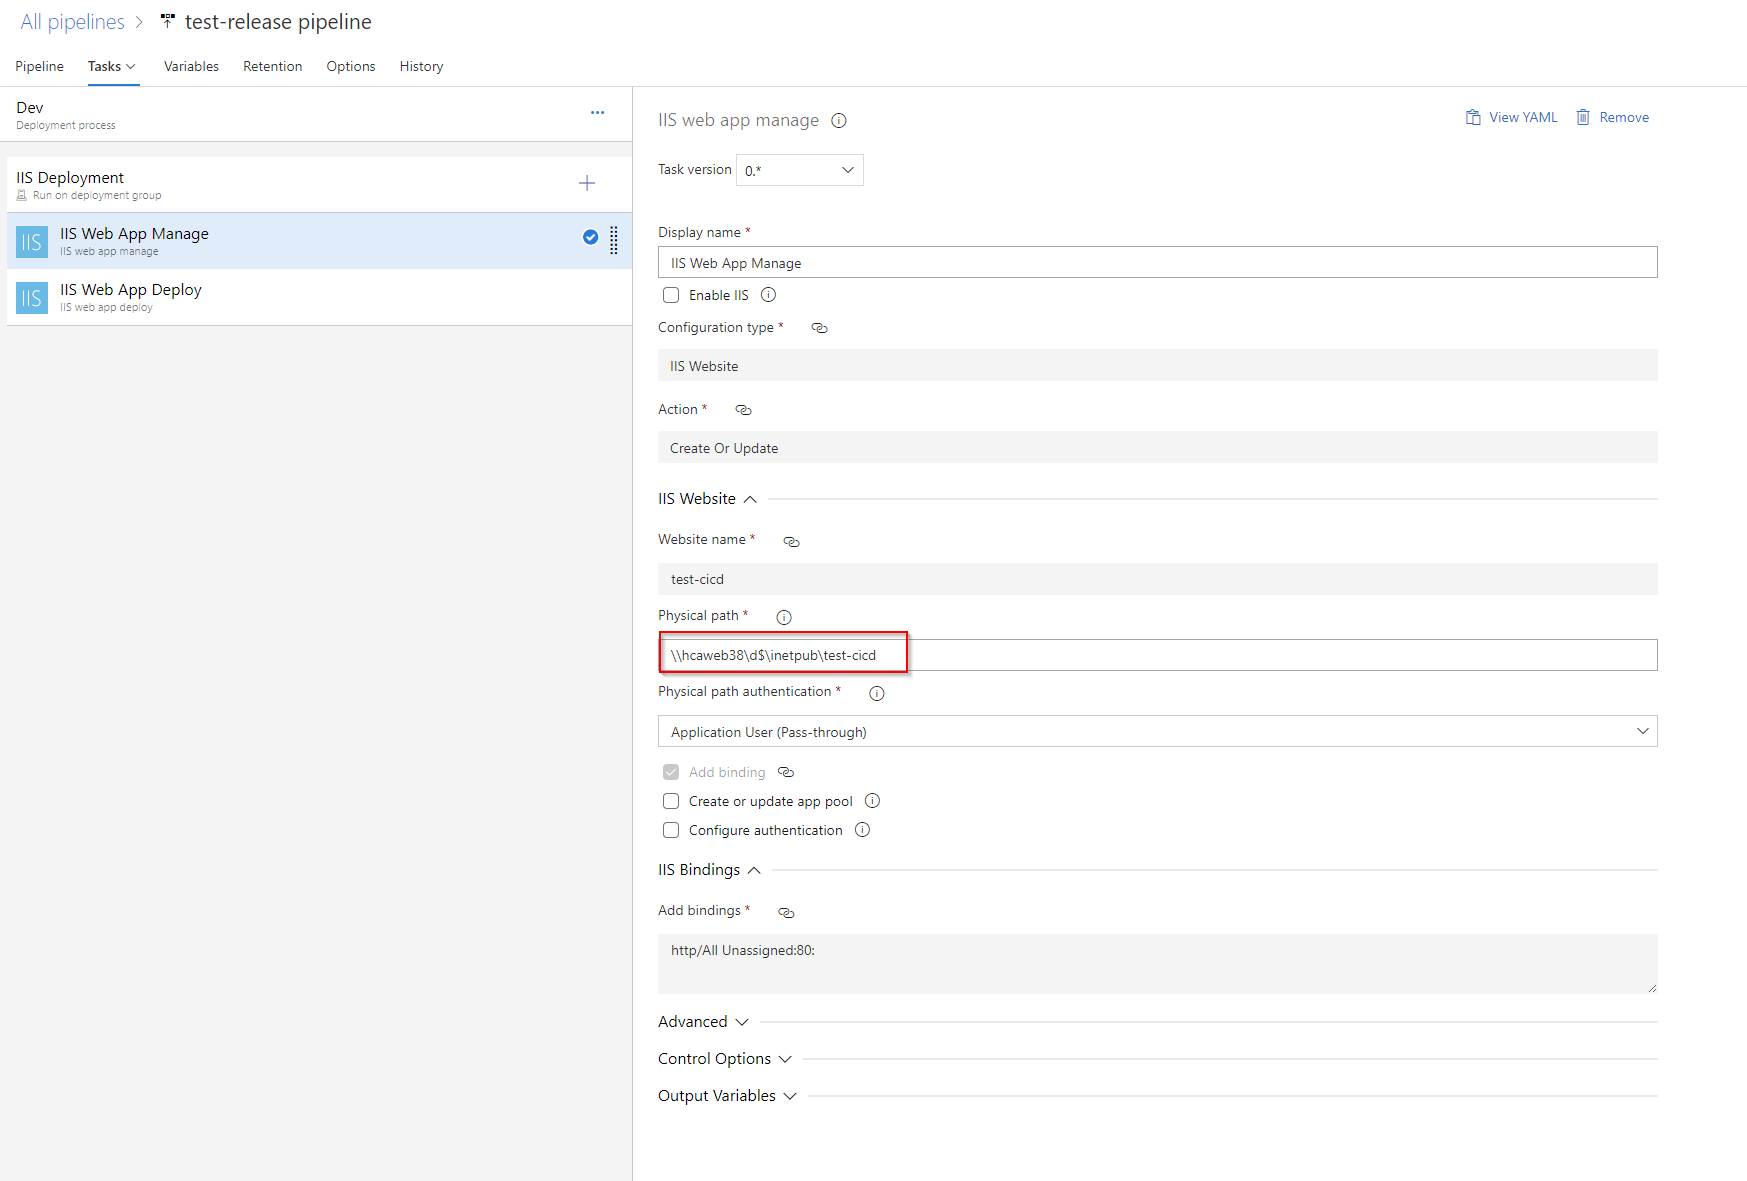
IIS Web App Manage
#Your build pipeline references an undefined variable named ‘Parameters.IISDeploymentType’. Create or edit the build pipeline for this YAML file, define the variable on the Variables tab. See https://go.microsoft.com/fwlink/?linkid=865972
#Your build pipeline references an undefined variable named ‘Parameters.ActionIISWebsite’. Create or edit the build pipeline for this YAML file, define the variable on the Variables tab. See https://go.microsoft.com/fwlink/?linkid=865972
#Your build pipeline references an undefined variable named ‘Parameters.WebsiteName’. Create or edit the build pipeline for this YAML file, define the variable on the Variables tab. See https://go.microsoft.com/fwlink/?linkid=865972
#Your build pipeline references an undefined variable named ‘Parameters.AddBinding’. Create or edit the build pipeline for this YAML file, define the variable on the Variables tab. See https://go.microsoft.com/fwlink/?linkid=865972
#Your build pipeline references an undefined variable named ‘Parameters.Bindings’. Create or edit the build pipeline for this YAML file, define the variable on the Variables tab. See https://go.microsoft.com/fwlink/?linkid=865972
#Your build pipeline references an undefined variable named ‘Parameters.WebsiteName’. Create or edit the build pipeline for this YAML file, define the variable on the Variables tab. See https://go.microsoft.com/fwlink/?linkid=865972
#Your build pipeline references an undefined variable named ‘Parameters.VirtualPathForApplication’. Create or edit the build pipeline for this YAML file, define the variable on the Variables tab. See https://go.microsoft.com/fwlink/?linkid=865972
#Your build pipeline references an undefined variable named ‘Parameters.AppPoolName’. Create or edit the build pipeline for this YAML file, define the variable on the Variables tab. See https://go.microsoft.com/fwlink/?linkid=865972

steps:
- task: IISWebAppManagementOnMachineGroup@0
  displayName: 'IIS Web App Manage'
  inputs:
    IISDeploymentType: '$(Parameters.IISDeploymentType)'
    ActionIISWebsite: '$(Parameters.ActionIISWebsite)'
    WebsiteName: '$(Parameters.WebsiteName)'
    WebsitePhysicalPath: '\\hcaweb38\d$\inetpub\test-cicd'
    AddBinding: '$(Parameters.AddBinding)'
    Bindings: '$(Parameters.Bindings)'
    ParentWebsiteNameForVD: '$(Parameters.WebsiteName)'
    VirtualPathForVD: '$(Parameters.VirtualPathForApplication)'
    ParentWebsiteNameForApplication: '$(Parameters.WebsiteName)'
    VirtualPathForApplication: '$(Parameters.VirtualPathForApplication)'
    AppPoolName: '$(Parameters.AppPoolName)'
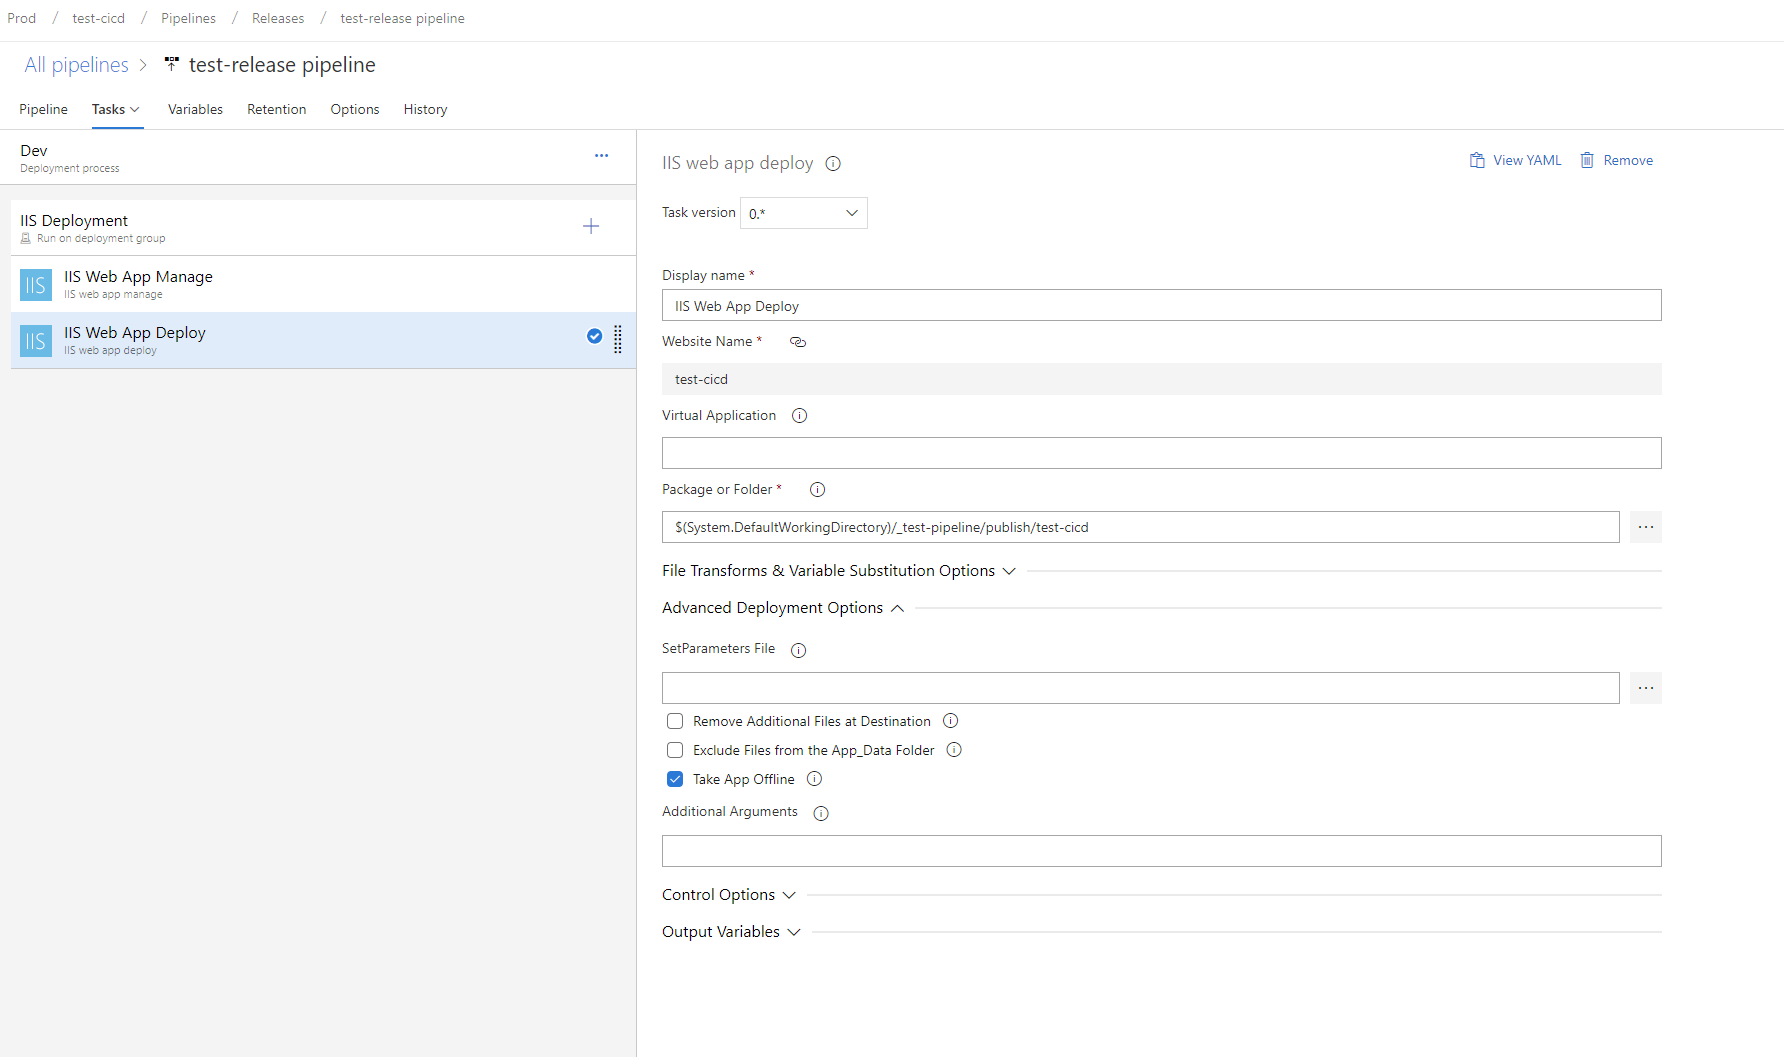
IIS Web App Deploy
#Your build pipeline references an undefined variable named ‘Parameters.WebsiteName’. Create or edit the build pipeline for this YAML file, define the variable on the Variables tab. See https://go.microsoft.com/fwlink/?linkid=865972

steps:
- task: IISWebAppDeploymentOnMachineGroup@0
  displayName: 'IIS Web App Deploy'
  inputs:
    WebSiteName: '$(Parameters.WebsiteName)'
    Package: '$(System.DefaultWorkingDirectory)/_test-pipeline/publish/test-cicd'
    TakeAppOfflineFlag: True
    XmlVariableSubstitution: True
    JSONFiles: '**\appsettings.json'
Deploy the artifact to another server
Sometime, we do not want host/deploy the website on the same server contains Azure Devops site. We could deploy the artifact on another server by following steps.
Modify the release pipeline (physical path) to point to the other location on server that we want to deploy the code.
The origninal path is
%SystemDrive%\inetpub\test-cicd\wwwroot
For the original path, the code will be stored at C:\inetpub\test-cicd\wwwroot on windows server.
We could change it to something like this
\\hcaweb38\d$\inetpub\test-cicd
We may encounter the issue below.
Issue: Access is denied

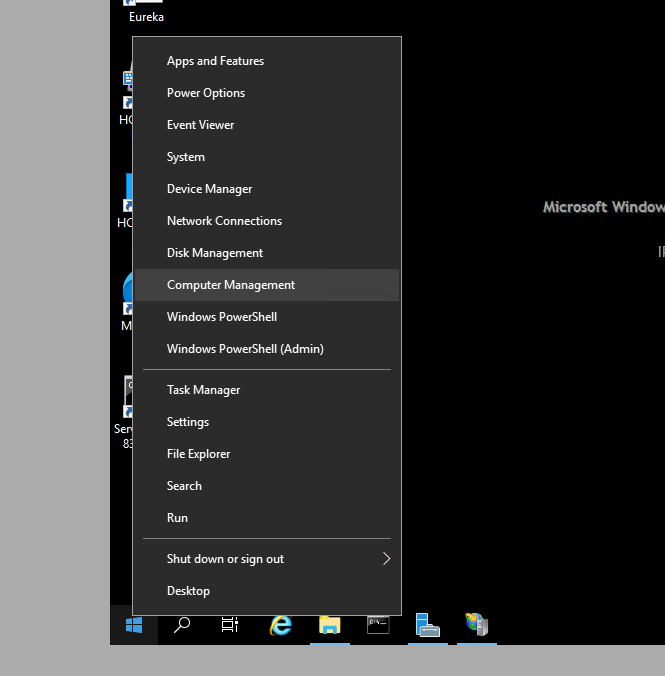
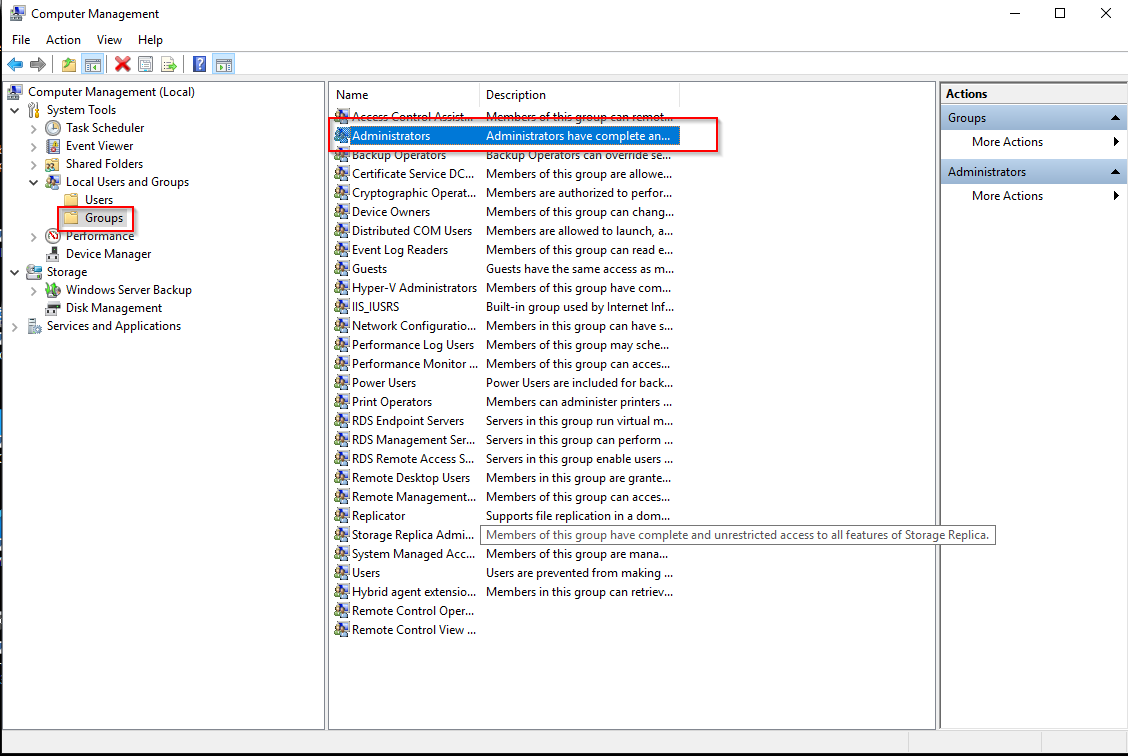
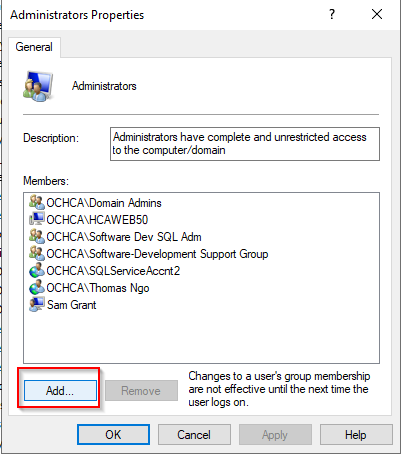
To resolve this issue, we can make the Azure Devops server (hcaweb38) to become a local admin of the server (hcaweb50) that we want to push the code. To do this, open the Computer Management on hcaweb38 and add the hcaweb50 as new user
When add user > click search > select computer as Object Type
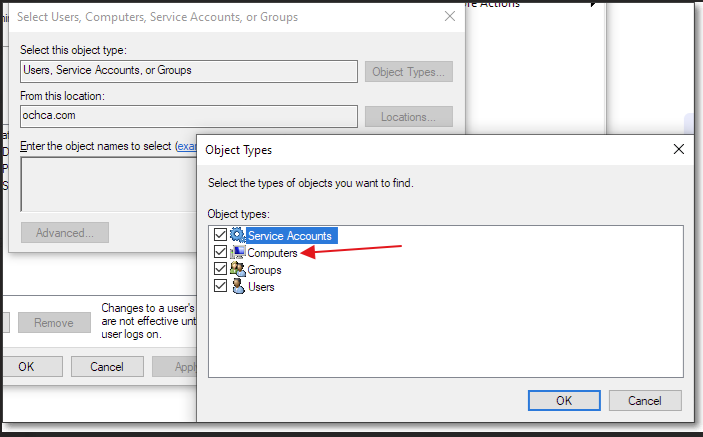
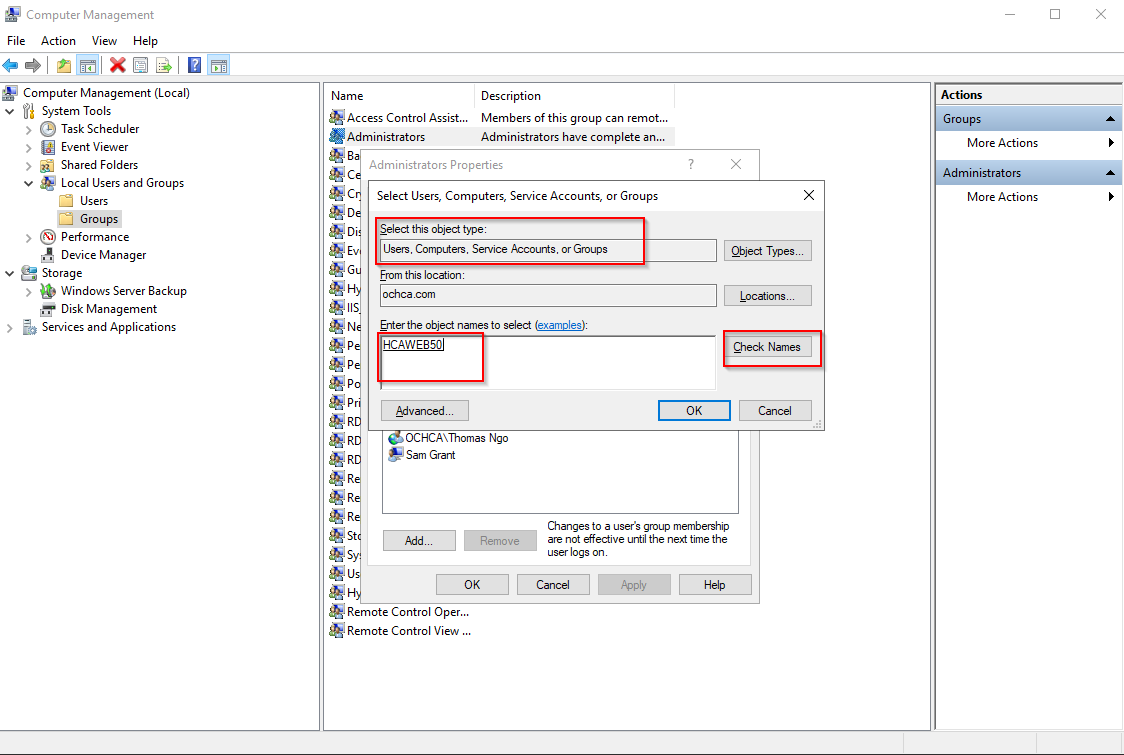
Note: users and computer are all Active Directory Objects
Reference Links
- https://learn.microsoft.com/en-us/azure/devops/pipelines/architectures/devops-pipelines-baseline-architecture?view=azure-devops
- https://learn.microsoft.com/en-us/azure/devops/pipelines/customize-pipeline?view=azure-devops#customize-ci-triggers
- https://learn.microsoft.com/en-us/azure/devops/pipelines/build/history?view=azure-devops#my-nuget-push-task-is-failing-with-the-following-error-error-unable-to-get-local-issuer-certificate-how-can-i-fix-this
- https://learn.microsoft.com/en-us/azure/devops/pipelines/tasks/reference/?view=azure-pipelines